<?xml version="1.0" encoding="utf-8"?><feed xmlns="http://www.w3.org/2005/Atom" ><generator uri="https://jekyllrb.com/" version="3.10.0">Jekyll</generator><link href="/feed.xml" rel="self" type="application/atom+xml" /><link href="/" rel="alternate" type="text/html" /><updated>2026-04-08T17:21:20+00:00</updated><id>/feed.xml</id><title type="html">GFickel Blog</title><subtitle>A Blog mostly geared toward Machine Learning and high performance code.</subtitle><entry><title type="html">Apple Pies and License Plate Recognitions from Scratch</title><link href="/jekyll/update/2024/12/11/creating-a-license-plate-detector-from-scratch.html" rel="alternate" type="text/html" title="Apple Pies and License Plate Recognitions from Scratch" /><published>2024-12-11T15:00:00+00:00</published><updated>2024-12-11T15:00:00+00:00</updated><id>/jekyll/update/2024/12/11/creating-a-license-plate-detector-from-scratch</id><content type="html" xml:base="/jekyll/update/2024/12/11/creating-a-license-plate-detector-from-scratch.html"><![CDATA[<p><img src="/assets/apple_pie.jpg" alt="https://www.flickr.com/photos/strawbryb/7266786206" /></p>

<p>The idea of creating something from scratch is both intimidating and exciting. It is tough to stare at a blank screen (usually a programming IDE), waiting for us to type the first characters of a big new project. But this is also a moment full of new possibilities, experiments, and learning. And as Carl Sagan once said, “if you wish to make an apple pie from scratch you must first invent the universe”. With that cosmic perspective in mind, let’s set our expectations straight on what we mean by “from scratch” and what we want to achieve:</p>

<ul>
  <li><strong>Any Deep Learning framework allowed</strong>: pytorch, JAX, keras, etc.</li>
  <li><strong>Use the fewest libraries possible</strong>: this is both good for local debugging, general code understanding (i.e., our code does not jump into a black box), and makes it much more flexible, such as upgrading our frameworks to newer versions.</li>
  <li><strong>Should run fast on CPU</strong>: the GPU world is great, but I want something that runs somewhat fast on CPU. I’ll say that 100ms on my low/midrange notebook is good enough (AMD Ryzen 7 5700U).</li>
  <li><strong>Simple solution</strong>: ideally I would want a single end-to-end network, i.e., pass an image and receive the list of plates with their text, but this might be too challenging…</li>
</ul>

<p>So with that in mind, what is a License Plate Recognition (aka LPR)? It’s just a system that both detects and reads the license plates from an image/video. It is commonly used in private parking lots, traffic monitoring systems, and similar applications.</p>

<h2 id="solution-pipeline">Solution Pipeline</h2>

<p>A good place to start is to examine the current state-of-the-art approaches, though license plate recognition isn’t currently a hot research topic. Drawing from my past experience (this won’t be my first nor second LPR implementation), I believe that a conceptually simple and easy to implement solution would be to tackle this problem in 2 stages:</p>

<ol>
  <li>Plate Detection: given an image or video frame, find all the license plates positions. Usually as rectangular bounding boxes, but the plate corners would be better.</li>
  <li>Plate Recognition: for each detection, crop the plate image and run an OCR network.</li>
</ol>

<p>This is not an end-to-end solution as I wanted, but it’s so much easier to compose and train that it seems like a good approach. This gives us two areas to research: detection and OCR.</p>

<h2 id="choosing-our-networks">Choosing our Networks</h2>

<p>For detection, I had great results with <a href="https://github.com/deepinsight/insightface/tree/master/detection/scrfd">SCRFD</a>. It is a network specially tailored for face detection, and the reason why a regular Object Detector was not good enough for faces was quite interesting: most faces are small compared to the whole image. Therefore, regular CNN approaches struggle with this because their deeper layers, which are responsible for generating complex features, lose spatial resolution due to successive downsampling operations like MaxPool.</p>

<p>How this is solved: with a powerful neck that combines the information of several higher dimensional layers with the later and smaller ones. This allows the network to get sophisticated features even for small objects on the image. This approach combined with a carefully crafted backbone made SCRFD a really small and fast face detection network.</p>

<p>But why am I talking so much about faces? Well, in many scenarios, I believe that license plates also have the same problem: they appear very small within the whole image. Therefore, I believe that this approach should also work, and we are going to stick to it.</p>

<p>And for OCR? I’ve read many papers on what they usually call Text Recognition or Scene Text Recognition. I’ve found that many state-of-the-art papers are combining some language model to add a prior on the pure OCR. This was previously done using a dictionary and beam search, where we would get a word like “NUMBR” and it would be changed to “NUMBER”. Using a Language Model is, however, a more robust solution.</p>

<p>It is important, though, to check our scenario: license plates are almost random, usually only containing some simple structure such as number of characters and fixed places for numbers and letters. Using a language model just seems overkill for such simple rules, and possibly will even hurt the performance if we are not careful during the training stage.</p>

<p>After some more searching, I’ve found <a href="https://arxiv.org/abs/2206.00311">MaskOCR</a>. It uses Vision Transformer (ViT) for encoding our words, which is, in itself, a much more intuitive approach than CNN-based methods for this particular task. The transformer can naturally subdivide our image into vertical patches, and their relationships will be given by the attention phase. I will not get into many details on how it works, but it first has an initial training process that uses masked autoencoders (MAE) to initialize the encoder part. Afterwards, we attach a decoder with a linear layer and do the final OCR predictions. It is a simple enough solution that we can implement, and it achieved really good results, so that’s our OCR network.</p>

<h2 id="implementing-them">Implementing Them</h2>

<p>Fortunately, SCRFD already has an open-source implementation available, which provided a great starting point. However, it uses the <a href="https://github.com/open-mmlab">OpenMMLab</a> libraries. They are awesome, and we can easily change some configs and get some really new and state-of-the-art networks. But with this great flexibility comes a serious drawback: the installation process is janky. We have to use openmim instead of pip or conda, making it harder to config our environment. Also, it is quite strict with CUDA and PyTorch versions, so we are kinda stuck with older releases.</p>

<p>This was a big no-go for this project, so I decided to directly get the code that I need and drop this requirement altogether. It took a bit of work, changing some interfaces and simplifying some details, but I’ve managed to do it. And in the process, I’ve learned a lot about how OpenMMDetection works, which is a great thing.</p>

<p>Also, I decided to use the <a href="https://arxiv.org/abs/1911.09070">EfficientDet</a> BiFPN (bi-directional feature pyramid network) for the neck. It proved itself as a very strong neck, and I think that being bi-directional is a really good strategy to make the best use of our limited backbone features. And I’m calling them limited only because I’ll use the smallest backbone that I can find, and that was <a href="https://arxiv.org/abs/2404.10518">MobileNetV4</a>. In the end it is a little bit different from SCRFD, but the main gist of it remains, only updating some parts.</p>

<p>For MaskOCR it was a bit trickier: there was no implementation available. This is not that big of a deal, though, since I was able to get the more complicated stuff from <a href="https://github.com/lucidrains/vit-pytorch/">ViT Pytorch</a>, and only had to piece everything together and set up the training process. It took a bit of work but it paid off.</p>

<p>Both implementations can be found here: <a href="https://github.com/gfickel/alpr">https://github.com/gfickel/alpr</a></p>

<h2 id="training-everything">Training Everything</h2>

<p>Training an LPR system requires both quality data and careful parameter tuning. Let’s break down the process, starting with dataset selection and preparation.</p>

<p>The first step on the training process is actually finding and preparing our data. I’ve found a really interesting dataset called <a href="https://github.com/detectRecog/CCPD">CCPD2019</a>. It contains over 300K annotated images of Chinese license plates, and even has some subsets with different scenarios. Those are the ones that I’m using:</p>

<ul>
  <li><strong>ccpd_base</strong>: good set of images, used for training</li>
  <li><strong>ccpd_weather</strong>: images captured in heavy weather, used for validation</li>
  <li><strong>ccpd_challenge</strong>: used for testing</li>
</ul>

<p>The training process was somewhat straightforward: I’ve used AdamW, <a href="https://blog.dlib.net/2018/02/automatic-learning-rate-scheduling-that.html">dlib plateau detection</a> to check when the learning rate should be decreased, and for the detection model, I’ve set the backbone learning rate to 1/10 of the rest of the network. All of this and the final weights can be found on my GitHub repo: https://github.com/gfickel/alpr</p>

<h3 id="hyperparameters-tested">Hyperparameters Tested</h3>

<p>For the Detection network, I only changed the start learning rate and used weight_decay=0.01 with the largest batch size that my GPU could handle. I did a quick check on some possible backbones such as ResNet and EfficientNet but mainly stuck with MobileNet V4 since it was providing the bigger bang for the buck.</p>

<p>Training MaskOCR was a little bit more complicated. Here are some key parameters:</p>

<ul>
  <li><strong>image size</strong>: I started using 32x128, but when I changed to 48x192 I quickly noticed a bump in accuracy.</li>
  <li><strong>num encoder layers</strong>: I tried several combinations, but every time I used less than 8 the accuracy quickly dropped, and higher numbers stayed the same or increased overfitting. I ended up using 8.</li>
  <li><strong>num decoder layers</strong>: also tested several values, and 6 was the best one.</li>
  <li><strong>dropout</strong>: I added dropout both on encoder and decoder phases with a value of 0.25, all in the name of avoiding overfitting.</li>
  <li><strong>num encoder heads</strong>: either 8 or 12 were giving me good results but 12 was just a tad bit better.</li>
  <li><strong>embed_dim</strong>: great influence on the results. 624 was the sweet spot for me.</li>
</ul>

<p>This network also had a tendency to overfit. I had to write my custom augmentation code and added a parameter to control its strength. Even with 300K images, heavy augmentations were fundamental in getting good results.</p>

<h2 id="results">Results</h2>

<p>We achieved 93% accuracy on ccpd_challenge, the hardest set and usually reserved for testing. Notice that there are some annotation problems, mostly invalid plates and humanly unreadable plates. We can argue that “unreadable” is somewhat subjective, and that the model should be able to outperform humans. However, this makes it quite challenging to determine if the mistake came from the network or the annotation. Here is a very well-behaved example:</p>

<p><img src="/assets/alpr.jpg" alt="https://www.flickr.com/photos/strawbryb/7266786206" /></p>

<p>And what about the runtime? I’ve run some tests on my personal notebook, with an AMD Ryzen 7 5700U (with a modest TDP of 15W), 12GB RAM, Ubuntu 23.04:</p>

<ul>
  <li><strong>Detection</strong>: ~80ms</li>
  <li><strong>OCR (per plate)</strong>: ~48ms</li>
</ul>

<p>We’ve exceeded our initial budget of 100ms by 28ms, which is significant. We definitely can iterate further on both networks, testing the impact of some hyperparameters on the final runtime/accuracy and find some better ones. However, I’m running low on time, and I’m happy with where we are.</p>

<h2 id="missing-steps-for-deploy">Missing Steps for Deploy</h2>

<p>There is a world of difference between ideal research conditions and actually deploying a Machine Learning model. It is important to define this at the very start of the project and update our priorities and goals accordingly. Here are some questions that we should always ask:</p>

<ul>
  <li>Is it going to work on pictures or video?</li>
  <li>Maximum latency? 100ms, 1s, 10s?</li>
  <li>Will it run on Cloud? If so, on CPU, GPU, TPU?</li>
  <li>Will it run on smartphones? Android, iOS? Minimum SDK and phone specs?</li>
  <li>What metrics should we use? FAR/FRR, AuC? And what is our goal, remembering that there is no perfect system.</li>
</ul>

<p>These questions will give us a set of constraints that we must follow: maximum latency and where should we measure it (CPU, GPU, smartphone), model size (really important for smartphones), architecture design (perhaps we can use some Android/iOS AI building blocks), etc.</p>

<h2 id="some-tips">Some Tips</h2>

<p>It is a very fun and challenging process to try and make something as big as an LPR, but there are many pitfalls down the bumpy road. Here are some key tips for a much faster and productive process:</p>

<ul>
  <li><strong>Good Logging</strong>: use a platform that makes it easy to compare multiple training sessions. I’m using <a href="https://wandb.ai/">Weights and Bias</a> but you should use whatever you like.</li>
  <li><strong>FAST Iteration</strong>: quick iteration time doesn’t mean only making a code change and running/debugging, but also fast trains. Ideally a full trained model should take no longer than an hour. Usually you should use a smaller train dataset and some smarter way to train, such as <a href="https://docs.fast.ai/callback.schedule.html#learner.fit_one_cycle">fit_one_cycle</a> and <a href="https://docs.fast.ai/callback.schedule.html#learner.lr_find">lr_find</a>. This way you can quickly test several ideas before sticking to a few and doing a full, lengthy train.</li>
  <li><strong>Good Debug Experience</strong>: either through notebooks or through an IDE, my preferred way. Programming is hard, and tracking all the tensors shapes and their modifications is usually quite tricky, so having an easy way to debug your code along the way can make your life so much easier.</li>
  <li><strong>LLMs Are Quite Good</strong>: I’m slightly embarrassed to admit that I’m a late LLM adopter, but I’m finding they are really helpful. However, they make a lot of mistakes, so you should never blindly trust them, but they are awesome in several areas such as writing boilerplate code, serving as an interactive documentation for many popular libs, and explaining some concepts with code and plots.</li>
</ul>

<p>And if my first image left you wanting an apple pie, look no further than the cooking master J. Kenji López-Alt help <a href="https://www.seriouseats.com/gooey-deep-dish-apple-pie-recipe">here</a>.</p>]]></content><author><name></name></author><category term="jekyll" /><category term="update" /><summary type="html"><![CDATA[]]></summary></entry><entry><title type="html">Creating a Model Server and Making Better Wheels</title><link href="/jekyll/update/2024/03/23/creating-a-model-server-and-making-better-wheels.html" rel="alternate" type="text/html" title="Creating a Model Server and Making Better Wheels" /><published>2024-03-23T15:00:00+00:00</published><updated>2024-03-23T15:00:00+00:00</updated><id>/jekyll/update/2024/03/23/creating-a-model-server-and-making-better-wheels</id><content type="html" xml:base="/jekyll/update/2024/03/23/creating-a-model-server-and-making-better-wheels.html"><![CDATA[<p>There are already some pretty good model servers with really good features, like <a href="https://github.com/triton-inference-server/server">Triton</a>, <a href="https://pytorch.org/serve/">TorchServer</a> and <a href="https://github.com/tensorflow/serving">TensorFlow Serving</a>. So… why make another one when xkcd already warned us?</p>

<p><img src="/assets/xkcd-standards.png" alt="XKCD Standards" /></p>

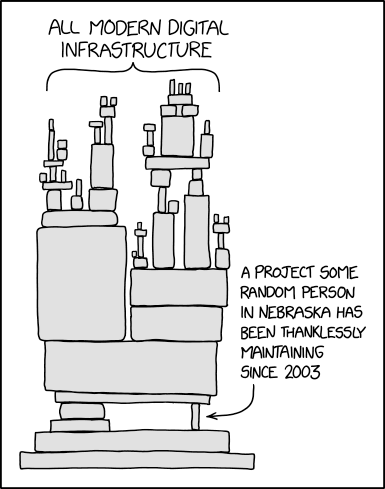
<p>I took some liberties using this comic strip, but the main point remains: why try to reinvent the wheel? This is an old and trusty saying, and there is so much new stuff that we could be creating instead of redoing something that has been done by several people, often with more experience in this particular area than you. But I don’t fully buy into that. It is a good rule of thumb for the, probably, vast majority of time, but not always. As John Carmack said in his <a href="https://www.youtube.com/watch?v=YOZnqjHkULc">Commencement Speech at UMKC</a>: “It’s almost perceived wisdom that you shouldn’t reinvent the wheel, but I urge you to occasionally try anyway. You’ll be better for the effort, and this is how we eventually end up with better wheels.” Getting better wheels is hard and not always guaranteed, but getting better for the effort is always the case.</p>

<p>So getting back to our Model Server project, I wanted something that was simple to use and could add any model that I wanted, either PyTorch, TensorFlow, or ONNX, using both CPU and GPU. Also, there is the hidden cost of using a big Open Source project that is fixing and debugging code. Don’t get me wrong, Open Source is awesome, but to immerse yourself into lots of new code, with several layers of little (and often not) documented abstractions is no easy feat. And like the following wisdom of xkcd warned us, we really should be careful when depending on a large stack of dependencies that we can barely grasp.</p>

<p><img src="/assets/xkcd-dependency.png" alt="XKCD Dependency" /></p>

<p>I will be starting with Python, since it is the language most used by ML folks, and should make our life easier when importing some more obscure and heavily code-dependent models. And to do our server <a href="https://grpc.io/">gRPC</a> seems like a great call: it is supported in a bunch of languages and defines the server interfaces through protobufs, which I quite like since it makes way harder to commit some silly errors passing and getting data from it. Let’s build it in parts, starting as simple as possible and adding new features after. If you want to look at the final code, check it out here: <a href="https://github.com/gfickel/tiny_model_server">https://github.com/gfickel/tiny_model_server</a></p>

<h2 id="barebones-server">Barebones Server</h2>

<p>With those previous definitions in mind, we can almost start writing the skeleton of a server, we just need to figure out how to define our interface and write the appropriate protobuf. Since I mostly deal with images, I’ll start implementing a route to receive an image and return a dict with the results. Let’s start with the protobuf:</p>

<div class="language-proto highlighter-rouge"><div class="highlight"><pre class="highlight"><code><span class="na">syntax</span> <span class="o">=</span> <span class="s">"proto3"</span><span class="p">;</span>

<span class="kd">service</span> <span class="n">Server</span> <span class="p">{</span>
  <span class="n">RPC</span> <span class="n">RunImage</span><span class="p">(</span><span class="n">ImageArgs</span><span class="p">)</span> <span class="k">returns</span> <span class="p">(</span><span class="n">Response</span><span class="p">)</span> <span class="p">{}</span>
<span class="p">}</span>

<span class="kd">message</span> <span class="nc">ImageArgs</span> <span class="p">{</span>
    <span class="n">NumpyImage</span> <span class="na">image</span> <span class="o">=</span> <span class="mi">1</span><span class="p">;</span>
    <span class="kt">string</span> <span class="na">model</span> <span class="o">=</span> <span class="mi">2</span><span class="p">;</span>
<span class="p">}</span>

<span class="kd">message</span> <span class="nc">Response</span> <span class="p">{</span>
    <span class="kt">string</span> <span class="na">data</span> <span class="o">=</span> <span class="mi">1</span><span class="p">;</span>
<span class="p">}</span>
</code></pre></div></div>

<p>There is a lot to unpack here. You can check the <a href="https://protobuf.dev/programming-guides/proto3/">Protobuf Docs</a> for more details, but the main point here is the declaration of a service Server that has an RPC called RunImage. This RPC takes an ImageArgs and returns a Response. Looking at a high level all seems to make sense, so let’s look a little bit closer.</p>

<p>ImageArgs and Response are both messages, that define how to pass and get data around to our server. Response has only a single field called data of type string. So we are getting a string back from our server after we call ImageArgs. It is not the dictionary we wanted, but we can easily encode and decode to string using <a href="https://docs.python.org/3/library/json.html">json lib</a>. Regarding ImageArgs, things get a little bit more complicated: we have a NumpyImage image that is the binary data and a string that defines what model we want. The most tricky part is the NumpyImage part, and that’s how I defined it:</p>

<div class="language-proto highlighter-rouge"><div class="highlight"><pre class="highlight"><code><span class="kd">message</span> <span class="nc">NumpyImage</span> <span class="p">{</span>
    <span class="kt">int32</span> <span class="na">height</span> <span class="o">=</span> <span class="mi">1</span><span class="p">;</span>
    <span class="kt">int32</span> <span class="na">width</span> <span class="o">=</span> <span class="mi">2</span><span class="p">;</span>
    <span class="kt">int32</span> <span class="na">channels</span> <span class="o">=</span> <span class="mi">3</span><span class="p">;</span>
    <span class="kt">bytes</span> <span class="na">data</span> <span class="o">=</span> <span class="mi">4</span><span class="p">;</span>
    <span class="kt">string</span> <span class="na">dtype</span> <span class="o">=</span> <span class="mi">5</span><span class="p">;</span>
<span class="p">}</span>
</code></pre></div></div>

<p>We have the height, width, and number of channels as integer types, the numpy dtype stored as a string, and the binary data on data. With all of this, we can almost send and receive numpy images (matrices) at will, we just need 2 things: learn how to access those datatypes in our Python and write some code to help us encode and decode to this format. To solve the first problem we must “compile” our protobuf file that will generate some Python code that we’ll use. Here’s the command:</p>

<div class="language-sh highlighter-rouge"><div class="highlight"><pre class="highlight"><code>python <span class="nt">-m</span> grpc_tools.protoc <span class="nt">-I</span><span class="nb">.</span> <span class="nt">--python_out</span><span class="o">=</span>./ <span class="nt">--pyi_out</span><span class="o">=</span>./ <span class="nt">--grpc_python_out</span><span class="o">=</span>./ simple_server.proto
</code></pre></div></div>

<p>This command will read our protobuf file and generate two new python files: simple_server_pb2.py and simple_server_pb2_grpc.py. I’ll mention them when we use them, but the main point is that they provide interfaces to our protobuf definitions.</p>

<p>And now, on the code to encode and decode our numpy images to the Protobuf messages:</p>

<div class="language-python highlighter-rouge"><div class="highlight"><pre class="highlight"><code><span class="n">np_dtype_to_str</span> <span class="o">=</span> <span class="p">{</span>
    <span class="n">np</span><span class="p">.</span><span class="n">dtype</span><span class="p">(</span><span class="n">np</span><span class="p">.</span><span class="n">uint8</span><span class="p">)</span>   <span class="p">:</span> <span class="s">'uint8'</span><span class="p">,</span>
    <span class="n">np</span><span class="p">.</span><span class="n">dtype</span><span class="p">(</span><span class="n">np</span><span class="p">.</span><span class="n">float32</span><span class="p">)</span> <span class="p">:</span> <span class="s">'float32'</span><span class="p">,</span>
    <span class="n">np</span><span class="p">.</span><span class="n">dtype</span><span class="p">(</span><span class="n">np</span><span class="p">.</span><span class="n">float64</span><span class="p">)</span> <span class="p">:</span> <span class="s">'float64'</span><span class="p">,</span>
<span class="p">}</span>
<span class="n">str_to_np_dtype</span> <span class="o">=</span> <span class="p">{</span><span class="n">v</span><span class="p">:</span> <span class="n">k</span> <span class="k">for</span> <span class="n">k</span><span class="p">,</span><span class="n">v</span> <span class="ow">in</span> <span class="n">np_dtype_to_str</span><span class="p">.</span><span class="n">items</span><span class="p">()}</span>

<span class="k">def</span> <span class="nf">numpy_to_proto</span><span class="p">(</span><span class="n">mat</span><span class="p">):</span>
    <span class="n">dtype_str</span> <span class="o">=</span> <span class="n">np_dtype_to_str</span><span class="p">[</span><span class="n">mat</span><span class="p">.</span><span class="n">dtype</span><span class="p">]</span>

    <span class="k">return</span> <span class="n">simple_server_pb2</span><span class="p">.</span><span class="n">NumpyImage</span><span class="p">(</span>
            <span class="n">height</span><span class="o">=</span><span class="n">mat</span><span class="p">.</span><span class="n">shape</span><span class="p">[</span><span class="mi">0</span><span class="p">],</span>
            <span class="n">width</span><span class="o">=</span><span class="n">mat</span><span class="p">.</span><span class="n">shape</span><span class="p">[</span><span class="mi">1</span><span class="p">],</span>
            <span class="n">channels</span><span class="o">=</span><span class="p">(</span><span class="mi">1</span> <span class="k">if</span> <span class="nb">len</span><span class="p">(</span><span class="n">mat</span><span class="p">.</span><span class="n">shape</span><span class="p">)</span><span class="o">==</span><span class="mi">2</span> <span class="k">else</span> <span class="n">mat</span><span class="p">.</span><span class="n">shape</span><span class="p">[</span><span class="mi">2</span><span class="p">]),</span>
            <span class="n">data</span><span class="o">=</span><span class="n">mat</span><span class="p">.</span><span class="n">tobytes</span><span class="p">(),</span>
            <span class="n">dtype</span><span class="o">=</span><span class="n">dtype_str</span>
        <span class="p">)</span>

<span class="k">def</span> <span class="nf">proto_to_numpy</span><span class="p">(</span><span class="n">image</span><span class="p">):</span>
    <span class="n">dtype</span> <span class="o">=</span> <span class="n">str_to_np_dtype</span><span class="p">[</span><span class="n">image</span><span class="p">.</span><span class="n">dtype</span><span class="p">]</span>

    <span class="n">np_image</span> <span class="o">=</span> <span class="n">np</span><span class="p">.</span><span class="n">frombuffer</span><span class="p">(</span><span class="n">image</span><span class="p">.</span><span class="n">data</span><span class="p">,</span> <span class="n">dtype</span><span class="o">=</span><span class="n">dtype</span><span class="p">)</span>
    <span class="k">if</span> <span class="n">image</span><span class="p">.</span><span class="n">channels</span> <span class="o">==</span> <span class="mi">1</span><span class="p">:</span>
        <span class="n">shape</span> <span class="o">=</span> <span class="p">(</span><span class="n">image</span><span class="p">.</span><span class="n">height</span><span class="p">,</span> <span class="n">image</span><span class="p">.</span><span class="n">width</span><span class="p">)</span>
    <span class="k">else</span><span class="p">:</span>
        <span class="n">shape</span> <span class="o">=</span> <span class="p">(</span><span class="n">image</span><span class="p">.</span><span class="n">height</span><span class="p">,</span> <span class="n">image</span><span class="p">.</span><span class="n">width</span><span class="p">,</span> <span class="n">image</span><span class="p">.</span><span class="n">channels</span><span class="p">)</span>

    <span class="k">return</span> <span class="n">np_image</span><span class="p">.</span><span class="n">reshape</span><span class="p">(</span><span class="n">shape</span><span class="p">)</span>
</code></pre></div></div>

<p>It is a quite straightforward code, with two different functions: one to encode a numpy image to a protobuf message, and another to do the opposite. I’ve hardcoded the supported dtypes on <em>np_dtype_to_str</em>, but it is trivial to expand to other ones. You may notice that we are using <em>simple_server_pb2</em> here, and that’s one of the automatically generated Python codes that I’ve mentioned. Ok, finally we have defined our interface and created our protobuf accordingly, we are just missing the most important part: the server! And here we have it:</p>

<div class="language-python highlighter-rouge"><div class="highlight"><pre class="highlight"><code><span class="k">class</span> <span class="nc">SimpleServer</span><span class="p">(</span><span class="n">simple_server_pb2_grpc</span><span class="p">.</span><span class="n">SimpleServer</span><span class="p">):</span>

    <span class="k">def</span> <span class="nf">__init__</span><span class="p">(</span><span class="bp">self</span><span class="p">):</span>
        <span class="bp">self</span><span class="p">.</span><span class="n">models</span> <span class="o">=</span> <span class="p">{}</span>

    <span class="k">def</span> <span class="nf">RunImage</span><span class="p">(</span><span class="bp">self</span><span class="p">,</span> <span class="n">request</span><span class="p">,</span> <span class="n">context</span><span class="p">):</span>
        <span class="n">model_name</span> <span class="o">=</span> <span class="n">request</span><span class="p">.</span><span class="n">model</span>
        <span class="n">image</span> <span class="o">=</span> <span class="n">proto_to_numpy</span><span class="p">(</span><span class="n">request</span><span class="p">.</span><span class="n">image</span><span class="p">)</span>
        <span class="c1"># results = self.models[model_name).run(image)
</span>        <span class="n">results</span> <span class="o">=</span> <span class="p">{</span><span class="s">'score'</span><span class="p">:</span> <span class="mf">42.0</span><span class="p">}</span>

        <span class="k">return</span> <span class="n">simple_server_pb2</span><span class="p">.</span><span class="n">Response</span><span class="p">(</span>
                <span class="n">data</span><span class="o">=</span><span class="n">json</span><span class="p">.</span><span class="n">dumps</span><span class="p">(</span><span class="n">results</span><span class="p">))</span>

<span class="k">def</span> <span class="nf">serve</span><span class="p">():</span>
    <span class="n">server</span> <span class="o">=</span> <span class="n">grpc</span><span class="p">.</span><span class="n">server</span><span class="p">(</span>
        <span class="n">futures</span><span class="p">.</span><span class="n">ThreadPoolExecutor</span><span class="p">(</span><span class="n">max_workers</span><span class="o">=</span><span class="mi">8</span><span class="p">))</span>
    <span class="n">route_servicer</span> <span class="o">=</span> <span class="n">SimpleServer</span><span class="p">()</span>
    <span class="n">server_pb2_grpc</span><span class="p">.</span><span class="n">add_SimpleServerServicer_to_server</span><span class="p">(</span>
        <span class="n">route_servicer</span><span class="p">,</span> <span class="n">server</span><span class="p">)</span>
    <span class="n">server</span><span class="p">.</span><span class="n">add_insecure_port</span><span class="p">(</span><span class="s">'[::]:50051'</span><span class="p">)</span>
    <span class="n">server</span><span class="p">.</span><span class="n">start</span><span class="p">()</span>
    <span class="n">server</span><span class="p">.</span><span class="n">wait_for_termination</span><span class="p">()</span>

<span class="k">if</span> <span class="n">__name__</span> <span class="o">==</span> <span class="s">'__main__'</span><span class="p">:</span>
    <span class="n">serve</span><span class="p">()</span>
</code></pre></div></div>

<p>Ok, now we have finally a server running! But first, let’s look at this code and see how it is done. First, we defined a class called SimpleServer that inherits another SimpleServer from <em>simple_server_pb2_grpc</em>, the other one of those automatically generated codes from protobuf. It provides all the nitty gritty stuff to create a gRPC service, and we just need to define our RPC routes as methods. In our case, that is <em>RunImage</em>, which gets an ImageArgs message, decodes our image back to numpy with <em>proto_to_numpy</em>, and gets the desired model from <em>request.model</em>, calls it and return a <em>Response</em> message. You may notice that we are faking running a model and returning a fixed response. This is the subject of our next Section.</p>

<p>With this SimpleServer in hand, we just need to set up a gRPC server and run it. There is not much going on there, we are basically creating a server with max_worker threads, adding our SimpleServer service to this server, defining a port to run it, and starting it. You can check out this <a href="https://grpc.io/docs/languages/python/basics/">official tutorial</a> to get some more insights, but we’ll get back to those in future sections.</p>

<h2 id="adding-models">Adding Models</h2>

<p>Ok, we have a model server that it is doing “everything”, except run models. Let’s tackle that. Recording one of our goals: it must be easy to add new models, even if they contain lots of Python code. I believe that one of the easiest things would be to create a defined interface that each model must comply with, and our model server loads all of them. For instance, we can have this base interface as the following:</p>

<div class="language-python highlighter-rouge"><div class="highlight"><pre class="highlight"><code><span class="k">class</span> <span class="nc">ModelInterface</span><span class="p">(</span><span class="n">abc</span><span class="p">.</span><span class="n">ABC</span><span class="p">):</span>

    <span class="k">def</span> <span class="nf">get_input_shape</span><span class="p">(</span><span class="bp">self</span><span class="p">):</span>
        <span class="s">""" Returns numpy shape """</span>
        <span class="k">return</span> <span class="bp">None</span>

    <span class="o">@</span><span class="n">abc</span><span class="p">.</span><span class="n">abstractmethod</span>
    <span class="k">def</span> <span class="nf">run</span><span class="p">(</span><span class="bp">self</span><span class="p">,</span> <span class="n">data</span><span class="p">,</span> <span class="n">args</span><span class="p">):</span>
        <span class="s">""" Returns a response dict """</span>

    <span class="k">def</span> <span class="nf">run_batch</span><span class="p">(</span><span class="bp">self</span><span class="p">,</span> <span class="n">data</span><span class="p">,</span> <span class="n">args</span><span class="p">):</span>
        <span class="s">""" Same interface as run, however, the images batch is encoded on
            a single numpy image. If the model does not provide a batch option
            just call it once for every input data.
        """</span>
        <span class="k">return</span> <span class="p">[</span><span class="bp">self</span><span class="p">.</span><span class="n">run</span><span class="p">(</span><span class="n">x</span><span class="p">,</span> <span class="n">args</span><span class="p">)</span> <span class="k">for</span> <span class="n">x</span> <span class="ow">in</span> <span class="n">data</span><span class="p">]</span>
</code></pre></div></div>

<p>And our model code would be something like this:</p>
<div class="language-python highlighter-rouge"><div class="highlight"><pre class="highlight"><code><span class="k">class</span> <span class="nc">Model</span><span class="p">(</span><span class="n">ModelInterface</span><span class="p">):</span>

    <span class="k">def</span> <span class="nf">__init__</span><span class="p">(</span><span class="bp">self</span><span class="p">):</span>
        <span class="s">""" Here you may load an instance of your model """</span>
        <span class="bp">self</span><span class="p">.</span><span class="n">model</span> <span class="o">=</span> <span class="s">'load my model here'</span>

    <span class="k">def</span> <span class="nf">get_input_shape</span><span class="p">(</span><span class="bp">self</span><span class="p">):</span>
        <span class="s">""" Returns just like numpy shape """</span>
        <span class="k">return</span> <span class="p">(</span><span class="mi">1080</span><span class="p">,</span> <span class="mi">1920</span><span class="p">,</span> <span class="mi">3</span><span class="p">)</span>

    <span class="k">def</span> <span class="nf">run</span><span class="p">(</span><span class="bp">self</span><span class="p">,</span> <span class="n">data</span><span class="p">,</span> <span class="n">args</span><span class="p">):</span>
        <span class="k">return</span> <span class="p">[(</span><span class="s">'object1'</span><span class="p">,</span><span class="mf">0.3</span><span class="p">),(</span><span class="s">'object2'</span><span class="p">,</span><span class="mf">0.5</span><span class="p">)]</span>
</code></pre></div></div>

<p>The idea is to inherent <strong>ModelInterface</strong>, load our model on <strong>__init__</strong>, and define, at least, the method <strong>run</strong>. Since all of this is just plain Python, we can do everything we want within run, which should make it quite simple to add here. For example, I’ve already used [MTCNN][https://github.com/davidsandberg/facenet/tree/master/src/align] which has quite a lot of Python code to deal with 3 different Neural Networks used in a cascade fashion, and it was straightforward to add it here.</p>

<p>Now the only problem left is to make our server find those models. I’m using a simple solution, consisting of creating a new folder within <strong>models/</strong> with the name of your model, and inside it, you will have an <strong>__init__.py</strong> with this class Model that implements the run method, and you can put whatever extra necessary code in there. Inside our server we can check all the available models like this:</p>

<div class="language-python highlighter-rouge"><div class="highlight"><pre class="highlight"><code><span class="n">all_models</span> <span class="o">=</span> <span class="n">os</span><span class="p">.</span><span class="n">listdir</span><span class="p">(</span><span class="s">'models/'</span><span class="p">)</span>
</code></pre></div></div>

<p>The last piece of the puzzle is to actually import and instantiate those models to a usable Python object. You can do this with <a href="https://docs.python.org/3/library/importlib.html">https://docs.python.org/3/library/importlib.html</a>, which enables us to import a module whose path is decided at runtime. In the end, we can have something like this on our server:</p>

<div class="language-python highlighter-rouge"><div class="highlight"><pre class="highlight"><code><span class="k">for</span> <span class="n">model</span> <span class="ow">in</span> <span class="n">os</span><span class="p">.</span><span class="n">listdir</span><span class="p">(</span><span class="s">'models/'</span><span class="p">):</span>
    <span class="n">model_path</span> <span class="o">=</span> <span class="sa">f</span><span class="s">'models.</span><span class="si">{</span><span class="n">model</span><span class="si">}</span><span class="s">'</span>
    <span class="n">module</span> <span class="o">=</span> <span class="nb">__import__</span><span class="p">(</span><span class="n">model_path</span><span class="p">,</span> <span class="nb">globals</span><span class="p">(),</span> <span class="nb">locals</span><span class="p">(),</span> <span class="p">[</span><span class="s">'object'</span><span class="p">])</span>
    <span class="n">importlib</span><span class="p">.</span><span class="nb">reload</span><span class="p">(</span><span class="n">module</span><span class="p">)</span>
    <span class="bp">self</span><span class="p">.</span><span class="n">models</span><span class="p">[</span><span class="n">model</span><span class="p">)</span> <span class="o">=</span> <span class="n">module</span><span class="p">.</span><span class="n">Model</span><span class="p">()</span>
</code></pre></div></div>

<p>With this code, we are instantiating all of our models and putting them into a dict, with its name as key. So, we can update our server code to be like this:</p>

<div class="language-python highlighter-rouge"><div class="highlight"><pre class="highlight"><code><span class="k">class</span> <span class="nc">SimpleServer</span><span class="p">(</span><span class="n">simple_server_pb2_grpc</span><span class="p">.</span><span class="n">SimpleServer</span><span class="p">):</span>

    <span class="k">def</span> <span class="nf">__init__</span><span class="p">(</span><span class="bp">self</span><span class="p">):</span>
        <span class="k">for</span> <span class="n">model</span> <span class="ow">in</span> <span class="n">os</span><span class="p">.</span><span class="n">listdir</span><span class="p">(</span><span class="s">'models/'</span><span class="p">):</span>
            <span class="n">model_path</span> <span class="o">=</span> <span class="sa">f</span><span class="s">'models.</span><span class="si">{</span><span class="n">model</span><span class="si">}</span><span class="s">'</span>
            <span class="n">module</span> <span class="o">=</span> <span class="nb">__import__</span><span class="p">(</span><span class="n">model_path</span><span class="p">,</span> <span class="nb">globals</span><span class="p">(),</span> <span class="nb">locals</span><span class="p">(),</span> <span class="p">[</span><span class="s">'object'</span><span class="p">])</span>
            <span class="n">importlib</span><span class="p">.</span><span class="nb">reload</span><span class="p">(</span><span class="n">module</span><span class="p">)</span>
            <span class="bp">self</span><span class="p">.</span><span class="n">models</span><span class="p">[</span><span class="n">model</span><span class="p">)</span> <span class="o">=</span> <span class="n">module</span><span class="p">.</span><span class="n">Model</span><span class="p">()</span>

    <span class="k">def</span> <span class="nf">RunImage</span><span class="p">(</span><span class="bp">self</span><span class="p">,</span> <span class="n">request</span><span class="p">,</span> <span class="n">context</span><span class="p">):</span>
        <span class="n">model_name</span> <span class="o">=</span> <span class="n">request</span><span class="p">.</span><span class="n">model</span>
        <span class="n">image</span> <span class="o">=</span> <span class="n">proto_to_numpy</span><span class="p">(</span><span class="n">request</span><span class="p">.</span><span class="n">image</span><span class="p">)</span>
        <span class="n">results</span> <span class="o">=</span> <span class="bp">self</span><span class="p">.</span><span class="n">models</span><span class="p">[</span><span class="n">model_name</span><span class="p">).</span><span class="n">run</span><span class="p">(</span><span class="n">image</span><span class="p">)</span>

        <span class="k">return</span> <span class="n">simple_server_pb2</span><span class="p">.</span><span class="n">Response</span><span class="p">(</span>
                <span class="n">data</span><span class="o">=</span><span class="n">json</span><span class="p">.</span><span class="n">dumps</span><span class="p">(</span><span class="n">results</span><span class="p">))</span>

<span class="k">def</span> <span class="nf">serve</span><span class="p">():</span>
    <span class="n">server</span> <span class="o">=</span> <span class="n">grpc</span><span class="p">.</span><span class="n">server</span><span class="p">(</span>
        <span class="n">futures</span><span class="p">.</span><span class="n">ThreadPoolExecutor</span><span class="p">(</span><span class="n">max_workers</span><span class="o">=</span><span class="mi">8</span><span class="p">))</span>
    <span class="n">route_servicer</span> <span class="o">=</span> <span class="n">SimpleServer</span><span class="p">()</span>
    <span class="n">server_pb2_grpc</span><span class="p">.</span><span class="n">add_SimpleServerServicer_to_server</span><span class="p">(</span>
        <span class="n">route_servicer</span><span class="p">,</span> <span class="n">server</span><span class="p">)</span>
    <span class="n">server</span><span class="p">.</span><span class="n">add_insecure_port</span><span class="p">(</span><span class="s">'[::]:50051'</span><span class="p">)</span>
    <span class="n">server</span><span class="p">.</span><span class="n">start</span><span class="p">()</span>
    <span class="n">server</span><span class="p">.</span><span class="n">wait_for_termination</span><span class="p">()</span>

<span class="k">if</span> <span class="n">__name__</span> <span class="o">==</span> <span class="s">'__main__'</span><span class="p">:</span>
    <span class="n">serve</span><span class="p">()</span>
</code></pre></div></div>

<p>Finally, we have a working model server! But wait, how do I call it? I can add as many models as I want, but how do I actually use this in my code? That’s a question for the next Section.</p>

<h2 id="calling-model-server">Calling Model Server</h2>

<p>We have a fully functional model server, but all will be in vain if it is a pain to use. Fortunately, we can make things easier by creating a Model Client, that your code can use. Ideally, we want to establish a client for each model within a single line, and another one to run the model. It really should be that simple, and the complexity should be invisible to the user. A good practice when defining interfaces is to write the final code how you think it should behave, with all (and only) information necessary. This is our end goal:</p>

<div class="language-python highlighter-rouge"><div class="highlight"><pre class="highlight"><code><span class="n">model</span> <span class="o">=</span> <span class="n">ModelClient</span><span class="p">(</span><span class="n">model</span><span class="o">=</span><span class="s">'example_image'</span><span class="p">,</span> <span class="n">ip</span><span class="o">=</span><span class="s">'localhost'</span><span class="p">,</span> <span class="n">port</span><span class="o">=</span><span class="mi">50000</span><span class="p">)</span>
<span class="n">res</span> <span class="o">=</span> <span class="n">mode</span><span class="p">.</span><span class="n">run_image</span><span class="p">(</span><span class="n">image</span><span class="p">)</span>
</code></pre></div></div>

<p>I’ve mentioned hiding the complexity but really there is not much to it. Mostly is just making sure that we managed to connect to our server and some boilerplate code to convert data back and forward. Let’s look at what it looks like:</p>

<div class="language-python highlighter-rouge"><div class="highlight"><pre class="highlight"><code><span class="k">class</span> <span class="nc">ModelClient</span><span class="p">(</span><span class="n">abc</span><span class="p">.</span><span class="n">ABC</span><span class="p">):</span>
    <span class="k">def</span> <span class="nf">__init__</span><span class="p">(</span><span class="bp">self</span><span class="p">,</span> <span class="n">model</span><span class="p">:</span> <span class="nb">str</span><span class="p">,</span> <span class="n">ip</span><span class="p">:</span> <span class="nb">str</span><span class="p">,</span> <span class="n">port</span><span class="p">:</span> <span class="nb">str</span><span class="o">=</span><span class="s">'50000'</span><span class="p">,</span> <span class="n">timeout</span><span class="p">:</span> <span class="nb">int</span><span class="o">=</span><span class="mi">60</span><span class="o">*</span><span class="mi">5</span><span class="p">):</span>
        <span class="bp">self</span><span class="p">.</span><span class="n">model</span> <span class="o">=</span> <span class="n">model</span>
        <span class="bp">self</span><span class="p">.</span><span class="n">channel</span> <span class="o">=</span> <span class="bp">None</span>
        <span class="bp">self</span><span class="p">.</span><span class="n">stub</span> <span class="o">=</span> <span class="bp">None</span>
        <span class="bp">self</span><span class="p">.</span><span class="n">size</span> <span class="o">=</span> <span class="bp">None</span>

        <span class="bp">self</span><span class="p">.</span><span class="n">_connect</span><span class="p">(</span><span class="n">ip</span><span class="p">,</span> <span class="n">port</span><span class="p">,</span> <span class="n">timeout</span><span class="p">)</span>

    <span class="k">def</span> <span class="nf">_connect</span><span class="p">(</span><span class="bp">self</span><span class="p">,</span> <span class="n">ip</span><span class="p">:</span> <span class="nb">str</span><span class="p">,</span> <span class="n">port</span><span class="p">:</span> <span class="nb">str</span><span class="p">,</span> <span class="n">timeout</span><span class="p">:</span> <span class="nb">int</span><span class="p">):</span>
        <span class="n">channel</span> <span class="o">=</span> <span class="n">grpc</span><span class="p">.</span><span class="n">insecure_channel</span><span class="p">(</span><span class="sa">f</span><span class="s">'</span><span class="si">{</span><span class="n">ip</span><span class="si">}</span><span class="s">:</span><span class="si">{</span><span class="n">port</span><span class="si">}</span><span class="s">'</span><span class="p">)</span>
        <span class="bp">self</span><span class="p">.</span><span class="n">stub</span> <span class="o">=</span> <span class="n">server_pb2_grpc</span><span class="p">.</span><span class="n">ServerStub</span><span class="p">(</span><span class="n">channel</span><span class="p">)</span>

        <span class="n">begin</span> <span class="o">=</span> <span class="n">time</span><span class="p">.</span><span class="n">time</span><span class="p">()</span>
        <span class="k">while</span> <span class="bp">self</span><span class="p">.</span><span class="n">size</span> <span class="ow">is</span> <span class="bp">None</span><span class="p">:</span> <span class="c1"># keep trying to connect until timeout
</span>            <span class="k">try</span><span class="p">:</span>
                <span class="n">response</span> <span class="o">=</span> <span class="n">stub</span><span class="p">.</span><span class="n">GetInputSize</span><span class="p">(</span>
                    <span class="n">server_pb2</span><span class="p">.</span><span class="n">StringArg</span><span class="p">(</span><span class="n">data</span><span class="o">=</span><span class="bp">self</span><span class="p">.</span><span class="n">model</span><span class="p">))</span>
                <span class="bp">self</span><span class="p">.</span><span class="n">size</span> <span class="o">=</span> <span class="n">json</span><span class="p">.</span><span class="n">loads</span><span class="p">(</span><span class="n">response</span><span class="p">.</span><span class="n">data</span><span class="p">)</span>
            <span class="k">except</span> <span class="n">grpc</span><span class="p">.</span><span class="n">_channel</span><span class="p">.</span><span class="n">_InactiveRpcError</span><span class="p">:</span>
                <span class="n">time</span><span class="p">.</span><span class="n">sleep</span><span class="p">(</span><span class="mi">1</span><span class="p">)</span>
            <span class="k">if</span> <span class="n">time</span><span class="p">.</span><span class="n">time</span><span class="p">()</span><span class="o">-</span><span class="n">begin</span> <span class="o">&gt;</span> <span class="n">timeout</span> <span class="ow">and</span> <span class="bp">self</span><span class="p">.</span><span class="n">size</span> <span class="ow">is</span> <span class="bp">None</span><span class="p">:</span>
                <span class="k">raise</span> <span class="n">ConnectionTimeout</span><span class="p">(</span><span class="n">ip</span><span class="p">,</span> <span class="n">port</span><span class="p">,</span> <span class="n">timeout</span><span class="p">)</span>

    <span class="k">def</span> <span class="nf">_get_image_arg</span><span class="p">(</span><span class="bp">self</span><span class="p">,</span> <span class="n">image</span><span class="p">:</span> <span class="n">np</span><span class="p">.</span><span class="n">array</span><span class="p">):</span>
        <span class="n">image_proto</span> <span class="o">=</span> <span class="n">utils</span><span class="p">.</span><span class="n">numpy_to_proto</span><span class="p">(</span><span class="n">image</span><span class="p">)</span>
        <span class="k">return</span> <span class="n">server_pb2</span><span class="p">.</span><span class="n">ImageArgs</span><span class="p">(</span>
                <span class="n">image</span><span class="o">=</span><span class="n">image_proto</span><span class="p">,</span>
                <span class="n">model</span><span class="o">=</span><span class="bp">self</span><span class="p">.</span><span class="n">model</span><span class="p">)</span>

    <span class="k">def</span> <span class="nf">run_image</span><span class="p">(</span><span class="bp">self</span><span class="p">,</span> <span class="n">image</span><span class="p">:</span> <span class="n">np</span><span class="p">.</span><span class="n">array</span><span class="p">):</span>
        <span class="s">"""Runs an image into the given model."""</span>
        <span class="k">if</span> <span class="n">image</span> <span class="ow">is</span> <span class="bp">None</span> <span class="ow">or</span> <span class="nb">min</span><span class="p">(</span><span class="n">image</span><span class="p">.</span><span class="n">shape</span><span class="p">[</span><span class="mi">0</span><span class="p">:</span><span class="mi">2</span><span class="p">])</span> <span class="o">&lt;=</span> <span class="mi">2</span><span class="p">:</span>
            <span class="k">return</span> <span class="p">{</span><span class="s">'error'</span><span class="p">:</span> <span class="s">'Bad image'</span><span class="p">}</span>
        <span class="n">run_arg</span> <span class="o">=</span> <span class="bp">self</span><span class="p">.</span><span class="n">_get_image_arg</span><span class="p">(</span><span class="n">image</span><span class="p">)</span>
        <span class="n">response</span> <span class="o">=</span> <span class="bp">self</span><span class="p">.</span><span class="n">stub</span><span class="p">.</span><span class="n">RunImage</span><span class="p">(</span><span class="n">run_arg</span><span class="p">)</span>
        <span class="k">return</span> <span class="n">json</span><span class="p">.</span><span class="n">loads</span><span class="p">(</span><span class="n">response</span><span class="p">.</span><span class="n">data</span><span class="p">)</span>
</code></pre></div></div>

<p>That’s a lot of code, so let’s start at the beginning. Our <strong>ModelClient</strong> takes as a parameter the model name (defined by its folder name), the ip and port of the server, and a connection timeout. On <strong>__init__</strong> we just call <strong>_connect</strong> which creates a channel and a stub to the server. The idea here is to have a single channel and stub per model that we always keep open, so on every new model call we don’t have to deal with all the handshaking stuff.</p>

<p>Notice that on <strong>_connect</strong> we keep trying to call GetInputShape RPC in order to see if our model server is on and responding. It is quite common to launch the model server at the same time as the application, and the model server may take longer to be up and running, so it is good to have a timeout to keep trying for a little bit. After we get our model input shape we are done and ready.</p>

<p>To use our client we are going to call the <strong>run_image</strong> method, which takes an image and returns a dict. We are using a helper method called <strong>_get_image_arg</strong> to format our ImageArgs protobuf message, and calling our server through our stub. Finally, we are getting the results from .data, which is a string, and converting it back to a dict with json.loads.</p>

<p>And that’s it, quite easy for our end user. Notice that despite ModelClient hiding most of the complexities, it is still quite in reach for any user to debug its code and make changes as they see fit. Talking about changes… what about performance?</p>

<h2 id="multiprocessing-server">Multiprocessing Server</h2>

<p>Yeah, performance is key, and a simple and easy to use model server is quite limited if we can’t scale vertically on this day and age of multiple GPUs and many cores CPUs. This is super simple on other servers, like <a href="https://gunicorn.org/">gunicorn</a>, but things are more barebones with gRPC. We have the <strong>max_workers</strong> argument when creating a server, but those workers are threads, and in python, they do not execute parallel code. They are great when there are many stalls due to IO, for example, but they don’t help us using our several CPU cores for max performance.</p>

<p>Reading gRPC’s own <a href="https://github.com/grpc/grpc/tree/master/examples/python/multiprocessing">multiprocessing example</a>, we have to do some tricks:</p>

<ol>
  <li>Fork our server code at the right time to create multiple processes</li>
  <li>Create a connection with the option so_reuseport. This makes it possible for all of our forks to share the same port, and the Unix kernel will be responsible for doing the load balancing</li>
  <li>This kernel load balancing doesn’t work if we want to keep our connection open to the server, since it will always be calling the same exact worker. We have to do load balancing manually</li>
</ol>

<p>First, let’s create those several process parallel workers. We can do this by changing our server code a little bit:</p>

<div class="language-python highlighter-rouge"><div class="highlight"><pre class="highlight"><code><span class="k">def</span> <span class="nf">_run_server</span><span class="p">(</span><span class="n">bind_address</span><span class="p">):</span>
    <span class="s">"""Starts a server in a subprocess."""</span>
    <span class="n">options</span> <span class="o">=</span> <span class="p">((</span><span class="s">'grpc.so_reuseport'</span><span class="p">,</span> <span class="mi">1</span><span class="p">),)</span>
    <span class="n">server</span> <span class="o">=</span> <span class="n">grpc</span><span class="p">.</span><span class="n">server</span><span class="p">(</span>
        <span class="n">ThreadPoolExecutor</span><span class="p">(</span><span class="n">max_workers</span><span class="o">=</span><span class="mi">8</span><span class="p">,),</span>
        <span class="n">options</span><span class="o">=</span><span class="n">options</span><span class="p">)</span>
    <span class="n">server_pb2_grpc</span><span class="p">.</span><span class="n">add_ServerServicer_to_server</span><span class="p">(</span><span class="n">ServerServicer</span><span class="p">(),</span> <span class="n">server</span><span class="p">)</span>
    <span class="n">server</span><span class="p">.</span><span class="n">add_insecure_port</span><span class="p">(</span><span class="n">bind_address</span><span class="p">)</span>
    <span class="n">server</span><span class="p">.</span><span class="n">start</span><span class="p">()</span>
    <span class="n">server</span><span class="p">.</span><span class="n">wait_for_termination</span><span class="p">()</span>

<span class="o">@</span><span class="n">contextlib</span><span class="p">.</span><span class="n">contextmanager</span>
<span class="k">def</span> <span class="nf">_reserve_port</span><span class="p">(</span><span class="n">port_number</span><span class="p">):</span>
    <span class="s">"""Find and reserve a port for all subprocesses to use."""</span>
    <span class="n">sock</span> <span class="o">=</span> <span class="n">socket</span><span class="p">.</span><span class="n">socket</span><span class="p">(</span><span class="n">socket</span><span class="p">.</span><span class="n">AF_INET6</span><span class="p">,</span> <span class="n">socket</span><span class="p">.</span><span class="n">SOCK_STREAM</span><span class="p">)</span>
    <span class="n">sock</span><span class="p">.</span><span class="n">setsockopt</span><span class="p">(</span><span class="n">socket</span><span class="p">.</span><span class="n">SOL_SOCKET</span><span class="p">,</span> <span class="n">socket</span><span class="p">.</span><span class="n">SO_REUSEPORT</span><span class="p">,</span> <span class="mi">1</span><span class="p">)</span>
    <span class="n">sock</span><span class="p">.</span><span class="n">bind</span><span class="p">((</span><span class="s">''</span><span class="p">,</span> <span class="n">port_number</span><span class="p">))</span>
    <span class="k">yield</span> <span class="n">sock</span><span class="p">.</span><span class="n">getsockname</span><span class="p">()[</span><span class="mi">1</span><span class="p">]</span>

<span class="k">def</span> <span class="nf">main</span><span class="p">():</span>
    <span class="k">with</span> <span class="n">_reserve_port</span><span class="p">(</span><span class="n">PORT_NUMBER</span><span class="p">)</span> <span class="k">as</span> <span class="n">port</span><span class="p">:</span>
        <span class="n">bind_address</span> <span class="o">=</span> <span class="sa">f</span><span class="s">'[::]:</span><span class="si">{</span><span class="n">port</span><span class="si">}</span><span class="s">'</span>
        <span class="k">with</span> <span class="n">Pool</span><span class="p">(</span><span class="n">processes</span><span class="o">=</span><span class="n">NUM_PARALLEL_WORKERS</span><span class="p">)</span> <span class="k">as</span> <span class="n">pool</span><span class="p">:</span>
            <span class="n">pool</span><span class="p">.</span><span class="n">starmap</span><span class="p">(</span><span class="n">_run_server</span><span class="p">,</span> <span class="p">[(</span><span class="n">bind_address</span><span class="p">,)</span> <span class="k">for</span> <span class="n">_</span> <span class="ow">in</span> <span class="nb">range</span><span class="p">(</span><span class="n">NUM_PARALLEL_WORKERS</span><span class="p">)])</span>

<span class="k">if</span> <span class="n">__name__</span> <span class="o">==</span> <span class="s">'__main__'</span><span class="p">:</span>
    <span class="n">main</span><span class="p">()</span>
</code></pre></div></div>

<p>Quite a little bit more code, so let’s dig in. First, we are calling <strong>_reserve_port</strong> with our port number. This function uses the <a href="https://docs.python.org/3/library/socket.html">socket</a> library to bind to our desired port and set the SO_REUSEPORT flag so that we can fork our server and share the same port. Then we are using <a href="https://docs.python.org/3/library/multiprocessing.html#multiprocessing.pool.Pool">multiprocessing.Pool</a> with our <strong>_run_server</strong> function that actually runs the server. This code is very similar to the old one, but now we are passing grpc.so_reuseport option to our grpc.server. That’s it, we now have a gRPC server that is running on <strong>NUM_PARALLEL_WORKERS</strong> workers in a truly parallel fashion.</p>

<p>The final piece of the puzzle here is the load balancer part. As previously mentioned, with this multiprocessing approach, it is up to the Unix kernel to distribute incoming connections to all available workers, however, this is a non-stopper for our use case. It is way too expensive to open and close a new connection for every model call. How can we solve this?</p>

<p>Well, the simplest but still pretty good solution that I’ve found is to implement a route on a server that will return the number of parallel workers that it has and the current worker PID (process ID). On the client side, I’ll keep opening several connections until I’ve established at least one on each server, so the client can freely choose where to send. This means that all the load balancing is going to be on the client side… Couldn’t we do this on the server side for maximum performance?</p>

<p>We could, but it requires a third piece on our puzzle, that will receive all the client’s requests and call the appropriate worker. The good thing is that this middleware sees all the clients and how each server worker is operating, so it has all the information to make the best decisions. However, this solution has two major drawbacks: adds another cost of transferring data, we’ll have client-&gt;middleware-&gt;server instead of client-&gt;server, and adds another layer of complexity. Those reasons are enough for me to choose client-side load balancing, and for my use, it is good enough.</p>

<p>There are many options to do client-side load balancing, but let’s start with the simplest: Round Robing. Basically, for a set of N workers, first, we’ll call Worker 1, then Worker 2, and thereafter, always make sure that we are spreading the load across all workers within time. That is how I implemented it, took only one line of code and it is working great! But this is an area where we could definitely improve: choose randomly the next worker so that we are less likely to have multiple clients in sync and stressing the same workers in the same order, or perhaps get some worker usage response attached to each RPC so we could do some more clever thinking before choosing. But for now, it is good enough.</p>

<h2 id="final-version-and-next-steps">Final Version and Next Steps</h2>

<p>Our final code is a little bit more feature complete: it has unit tests, builds a Docker image that makes it easy to use with Kubernetes for scaling it horizontally, and more interface options and error checks. You can check <a href="https://github.com/gfickel/tiny_model_server">here</a>.</p>

<p>But there are many things missing, including but not limited to:</p>
<ul>
  <li>Route to process an image and return an image. Useful for image segmentation, optical flow (returning a HxWx2 np.float32 image, most likely), and other applications. I already added <em>ImageResponse</em> as a message on server.proto, I just need to implement a new route.</li>
  <li>Better client-side load balancing as we mentioned.</li>
  <li>Some Kubernetes configs for easy horizontal scaling.</li>
  <li>Add some configurations to environment variables, such as port number and number of parallel workers. They can be easily when running the Docker images.</li>
  <li>Add Locust load tests.</li>
  <li>Add support to ssl_server_credentials.</li>
</ul>

<p>The good thing about being so small is that those things are somewhat simple to implement. And by simple I mean that there is not a lot of moving pieces here to keep track of, and they could be accomplished with a few lines of code.</p>

<h2 id="conclusion">Conclusion</h2>

<p>That was a journey, but we managed to have a fully working Model Server with only 483 total lines of Python code! And that is including comments and empty lines (although I’m excluding the unit tests and example models). And if we look at our requirements.txt we have only gRPC related packages, numpy and Pillow to deal with images, and pytest for our testing purposes. That seems like a reasonable list.</p>

<p>In the end, I expect that the main takeaway point here is not a tutorial on “How to Create an Awesome Model Server with only 400 lines of code!!!!”, but to be an inspiration to let us explore new avenues, learn more about surrounding topics, and in the process becoming a better programmer. This experience definitely changed the way I see and judge other model servers for my projects, both for “good” and “bad”. The “bad” is that I know how simple things <em>can</em> be, and sometimes drives me nuts having to deal with dependencies conflicts and tons of documentation just to add my model and start testing. On the other hand, there are also the “good” parts. I do appreciate even more all the features that may sound trivial but make our lives so much easier and can be a pain to implement.</p>

<p>Making better wheels is definitely hard and we may not get it, but improving myself in the process is definitely a nice byproduct. And sometimes we don’t need the best high-tech wheel, just a simple one that is just perfect for our needs.</p>]]></content><author><name></name></author><category term="jekyll" /><category term="update" /><summary type="html"><![CDATA[There are already some pretty good model servers with really good features, like Triton, TorchServer and TensorFlow Serving. So… why make another one when xkcd already warned us?]]></summary></entry><entry><title type="html">Making your GPU go BRRR: Creating a CUDA Layer in PyTorch</title><link href="/jekyll/update/2024/03/13/making-your-gpu-go-brrr-creating-a-cuda-layer-in-pytorch.html" rel="alternate" type="text/html" title="Making your GPU go BRRR: Creating a CUDA Layer in PyTorch" /><published>2024-03-13T15:00:00+00:00</published><updated>2024-03-13T15:00:00+00:00</updated><id>/jekyll/update/2024/03/13/making-your-gpu-go-brrr-creating-a-cuda-layer-in-pytorch</id><content type="html" xml:base="/jekyll/update/2024/03/13/making-your-gpu-go-brrr-creating-a-cuda-layer-in-pytorch.html"><![CDATA[<p>I still remember the “dark ages” of research, when I was still doing my masters when it was common to find really impactful publications that provided no code. And yes, I’ve sent my fair share of emails to authors… Fortunately, this is no longer the norm, and even somewhat frowned upon. Caffe, Tensorflow, Keras, PyTorch, and even more deep learning frameworks really helped everyone to create way smaller, cleaner code, that was also easier to share.</p>

<p>Those frameworks are really incredible and allow us to quickly implement and test new ideas, however, they are not always the fastest way, even if they use CUDA down the line. This is definitely becoming a bottleneck. PyTorch 2 implemented a compile process to fuse layers to improve GPU usage, Flash Attention did the same by directly programming Attention in CUDA and achieved an even greater runtime improvement. Some more unorthodox solutions, such as <a href="https://github.com/SHI-Labs/NATTEN">Neighborhood Attention</a>, also greatly benefited from manual CUDA programming.</p>

<p>CUDA programming may seem intimidating, at least it was for me. I first learned circa 2010 and it was a really bad development experience, but by watching an <a href="https://www.youtube.com/watch?v=nOxKexn3iBo">awesome video</a> by Jeremy Howard, I’ve learned that it is indeed possible to have a much better experience. The main idea is the following:</p>

<ol>
  <li>Implement the forward and backward pass in PyTorch. This gives access to an online debugger and the full functionality of Python, like Jupyter Notebooks.</li>
  <li>Validate the implementation with gradcheck. This somewhat magic function runs your forward pass and does numerical derivation to validate your backward pass code.</li>
  <li>Program the CUDA Kernel for forward and backward passes using Numba, directly in Python. This is the real thing, where we are dealing with CUDA threads and possibly memory management.</li>
  <li>Ask <a href="https://chat.openai.com/">Chat-GPT</a> to convert this code to C CUDA. Really, it works surprisingly well!</li>
  <li>Use PyTorch internal functionality to compile this C CUDA to a Python module that you can use with torch tensors.</li>
  <li>Use gradcheck again to verify that your CUDA written layer is 100% correct.</li>
</ol>

<p>It may be a couple of hoops, but the ability to develop CUDA code in Python makes our lives so much easier. You have easier integration with debugers, and the iteration time between changes in code and running it is nearly instant, compared to the long time it takes to compile C CUDA. You may noticed that mentioned both forward and backward passes, and unfortunately, if we use CUDA for our backward pass, we can’t rely on autograd to get this for us. But fortunately, we have this amazing function from PyTorch, <a href="https://pytorch.org/docs/stable/notes/gradcheck.html">gradcheck</a>, that will validate for us if our backpropagation is indeed correct.</p>

<p>We need some kind of end goal, and for us, it will be the implementation of the Sigmoid activation inspired by <a href="https://www.youtube.com/watch?v=oxC3T_-_Amw">David Oniani</a>. You’ll see that it has some interesting characteristics that will help us explore interesting (and important) aspects of creating a performant CUDA layer. And finally, all of this code can be found <a href="https://github.com/gfickel/cuda-sigmoid">here</a></p>

<h2 id="1-forward-and-backward-passes-in-pytorch">1. Forward and Backward passes in PyTorch</h2>

<p>The idea here is to do two functions: one for the forward pass and the backward one. But first, let’s remember the formula for the sigmoid and its derivative:</p>

\[\sigma(x) = \frac{1}{1+e^{-x}}\]

\[\sigma^{'}(x) = \sigma(x)(1-\sigma(x))\]

<p>Those are not that complicated to implement, especially the derivative that only depends on the value of the sigmoid that we already computed on the forward pass. However, this sigmoid equation does present some numerical instabilities, so it is better to implement the following:</p>

\[\sigma(x)=\begin{cases}
\frac{1}{1+e^{-x}} &amp; \text{ if } x&gt;=0 \\ 
\frac{e^{x}}{1+e^{x}} &amp; \text{ if } x&lt;0 
\end{cases}\]

<p>With this in mind, we can generate the following Python code:</p>

<div class="language-python highlighter-rouge"><div class="highlight"><pre class="highlight"><code><span class="k">def</span> <span class="nf">sigmoid_forward_torch</span><span class="p">(</span><span class="nb">input</span><span class="p">):</span>
    <span class="n">out_tensor</span> <span class="o">=</span> <span class="n">torch</span><span class="p">.</span><span class="n">empty_like</span><span class="p">(</span><span class="nb">input</span><span class="p">)</span>
    <span class="n">positive_mask</span> <span class="o">=</span> <span class="nb">input</span> <span class="o">&gt;=</span> <span class="mi">0</span>
    <span class="n">out_tensor</span><span class="p">[</span><span class="n">positive_mask</span><span class="p">]</span> <span class="o">=</span> <span class="mf">1.</span> <span class="o">/</span> <span class="p">(</span><span class="mf">1.</span> <span class="o">+</span> <span class="n">torch</span><span class="p">.</span><span class="n">exp</span><span class="p">(</span><span class="o">-</span><span class="nb">input</span><span class="p">[</span><span class="n">positive_mask</span><span class="p">]))</span>
    <span class="n">out_tensor</span><span class="p">[</span><span class="o">~</span><span class="n">positive_mask</span><span class="p">]</span> <span class="o">=</span> <span class="n">torch</span><span class="p">.</span><span class="n">exp</span><span class="p">(</span><span class="nb">input</span><span class="p">[</span><span class="o">~</span><span class="n">positive_mask</span><span class="p">])</span> <span class="o">/</span> <span class="p">(</span><span class="mf">1.</span> <span class="o">+</span> <span class="n">torch</span><span class="p">.</span><span class="n">exp</span><span class="p">(</span><span class="nb">input</span><span class="p">[</span><span class="o">~</span><span class="n">positive_mask</span><span class="p">]))</span>
    
    <span class="k">return</span> <span class="n">out_tensor</span>

<span class="k">def</span> <span class="nf">sigmoid_backward_torch</span><span class="p">(</span><span class="nb">input</span><span class="p">):</span>
    <span class="k">return</span> <span class="nb">input</span> <span class="o">*</span> <span class="p">(</span><span class="mi">1</span> <span class="o">-</span> <span class="nb">input</span><span class="p">)</span>
</code></pre></div></div>

<p>Notice that I’ve used a variable called <em>positive_mask</em> to create an index to identify positive and negative input values. Other than that, the code is somewhat straightforward.</p>

<h2 id="2-check-our-derivatives">2. Check our Derivatives</h2>

<p>Now that we have a Python code to do our forward and backward pass we can test if they are coherent with each other. In other words, we will use <a href="https://pytorch.org/docs/stable/notes/gradcheck.html">gradcheck</a> from PyTorch to run a forward pass, compute numerically what the derivative should be, and check our backward pass result. But first, we must set it within its autograd format. It is not that complicated, and stays like this:</p>

<div class="language-python highlighter-rouge"><div class="highlight"><pre class="highlight"><code><span class="k">class</span> <span class="nc">Sigmoid</span><span class="p">(</span><span class="n">torch</span><span class="p">.</span><span class="n">autograd</span><span class="p">.</span><span class="n">Function</span><span class="p">):</span>
    <span class="s">"""The Sigmoid activation function."""</span>

    <span class="o">@</span><span class="nb">staticmethod</span>
    <span class="k">def</span> <span class="nf">forward</span><span class="p">(</span><span class="n">ctx</span><span class="p">,</span> <span class="nb">input</span><span class="p">:</span> <span class="n">torch</span><span class="p">.</span><span class="n">Tensor</span><span class="p">)</span> <span class="o">-&gt;</span> <span class="n">torch</span><span class="p">.</span><span class="n">Tensor</span><span class="p">:</span>
        <span class="s">"""Performs a forward pass."""</span>

        <span class="n">out_tensor</span> <span class="o">=</span> <span class="n">torch</span><span class="p">.</span><span class="n">empty_like</span><span class="p">(</span><span class="nb">input</span><span class="p">)</span>
        <span class="n">positive_mask</span> <span class="o">=</span> <span class="nb">input</span> <span class="o">&gt;=</span> <span class="mi">0</span>
        <span class="n">out_tensor</span><span class="p">[</span><span class="n">positive_mask</span><span class="p">]</span> <span class="o">=</span> <span class="mf">1.</span> <span class="o">/</span> <span class="p">(</span><span class="mf">1.</span> <span class="o">+</span> <span class="n">torch</span><span class="p">.</span><span class="n">exp</span><span class="p">(</span><span class="o">-</span><span class="nb">input</span><span class="p">[</span><span class="n">positive_mask</span><span class="p">]))</span>
        <span class="n">out_tensor</span><span class="p">[</span><span class="o">~</span><span class="n">positive_mask</span><span class="p">]</span> <span class="o">=</span> <span class="n">torch</span><span class="p">.</span><span class="n">exp</span><span class="p">(</span><span class="nb">input</span><span class="p">[</span><span class="o">~</span><span class="n">positive_mask</span><span class="p">])</span> <span class="o">/</span> <span class="p">(</span><span class="mf">1.</span> <span class="o">+</span> <span class="n">torch</span><span class="p">.</span><span class="n">exp</span><span class="p">(</span><span class="nb">input</span><span class="p">[</span><span class="o">~</span><span class="n">positive_mask</span><span class="p">]))</span>
        
        <span class="n">ctx</span><span class="p">.</span><span class="n">save_for_backward</span><span class="p">(</span><span class="n">out_tensor</span><span class="p">)</span>

        <span class="k">return</span> <span class="n">out_tensor</span>

    <span class="o">@</span><span class="nb">staticmethod</span>
    <span class="k">def</span> <span class="nf">backward</span><span class="p">(</span><span class="n">ctx</span><span class="p">,</span> <span class="n">grad_output</span><span class="p">:</span> <span class="n">torch</span><span class="p">.</span><span class="n">Tensor</span><span class="p">)</span> <span class="o">-&gt;</span> <span class="n">torch</span><span class="p">.</span><span class="n">Tensor</span><span class="p">:</span>
        <span class="s">"""Performs a backpropagation."""</span>

        <span class="p">(</span><span class="n">result</span><span class="p">,)</span> <span class="o">=</span> <span class="n">ctx</span><span class="p">.</span><span class="n">saved_tensors</span>
        <span class="n">grad</span> <span class="o">=</span> <span class="n">result</span> <span class="o">*</span> <span class="p">(</span><span class="mi">1</span> <span class="o">-</span> <span class="n">result</span><span class="p">)</span>
        <span class="k">return</span> <span class="n">grad_output</span> <span class="o">*</span> <span class="n">grad</span>
</code></pre></div></div>

<p>Notice that both on forward and backward pass we are dealing with an additional variable: ctx. This is our context, that we can use to save some data on our forward pass to use on backward. This is quite handy for our Sigmoid since the backward pass is a simple formula that uses the forward pass result, so we save it on the context for our backpropagation.</p>

<p>Finally, on the backward pass, we get the sigmoid result that we stored on ctx and use it to compute its derivative. But we have another input, that is the input derivative that is being propagated to our layer. So our final gradient is this derivative multiplied by our sigmoid derivative.</p>

<p>With this in hand, we can call the following function to check if everything is correct:</p>

<div class="language-python highlighter-rouge"><div class="highlight"><pre class="highlight"><code><span class="n">sigmoid</span> <span class="o">=</span> <span class="n">Sigmoid</span><span class="p">.</span><span class="nb">apply</span>
<span class="n">data</span> <span class="o">=</span> <span class="n">torch</span><span class="p">.</span><span class="n">randn</span><span class="p">(</span><span class="mi">4</span><span class="p">,</span> <span class="n">dtype</span><span class="o">=</span><span class="n">torch</span><span class="p">.</span><span class="n">double</span><span class="p">,</span> <span class="n">requires_grad</span><span class="o">=</span><span class="bp">True</span><span class="p">)</span>

<span class="k">if</span> <span class="n">torch</span><span class="p">.</span><span class="n">autograd</span><span class="p">.</span><span class="n">gradcheck</span><span class="p">(</span><span class="n">sigmoid</span><span class="p">,</span> <span class="n">data</span><span class="p">,</span> <span class="n">eps</span><span class="o">=</span><span class="mf">6e-4</span><span class="p">,</span> <span class="n">atol</span><span class="o">=</span><span class="mf">1e-7</span><span class="p">):</span>
    <span class="k">print</span><span class="p">(</span><span class="s">'gradcheck successful :D'</span><span class="p">)</span>
<span class="k">else</span><span class="p">:</span>
    <span class="k">print</span><span class="p">(</span><span class="s">'gradcheck unsuccessful :D'</span><span class="p">)</span>
</code></pre></div></div>

<p>If everything is correct we are ready to think about how to implement it in CUDA, otherwise, we can back up and check what we did wrong.</p>

<h2 id="3-cuda-implementation-using-numba">3. CUDA Implementation using Numba</h2>

<p>(I will not dive into all the details on how CUDA works, but I suggest you check <a href="https://www.youtube.com/watch?v=nOxKexn3iBo">this video</a> by Jeremy Howard to see a great explanation about it!)</p>

<p>The first thing we need to do is decide how we are going to model this in CUDA. I believe the most sensible approach is to use a single thread for each element on the input Tensor, for both forward and backward passes. And to finally implement it, we can use the <a href="https://numba.pydata.org/">Numba library</a>, which is a JIT compiler for Python with support for CUDA, SIMD, and even threading. But for our case, we are more interested in the CUDA dev environment, especially the <a href="https://numba.pydata.org/numba-doc/latest/cuda/simulator.html#simulator">CUDA simulator</a>.</p>

<p>To start, the first thing we must do is set NUMBA_ENABLE_CUDASIM=’1’ as an environment variable before we import Numba. Then we just need to add the @cuda.jit decorator on top of our CUDA kernel function and we are good to go!</p>

<p>Let’s start with the following code for both the forward and backward passes:</p>
<div class="language-python highlighter-rouge"><div class="highlight"><pre class="highlight"><code><span class="kn">from</span> <span class="nn">numba</span> <span class="kn">import</span> <span class="n">cuda</span>
<span class="kn">import</span> <span class="nn">torch</span>

<span class="o">@</span><span class="n">cuda</span><span class="p">.</span><span class="n">jit</span>
<span class="k">def</span> <span class="nf">sigmoid_forward</span><span class="p">(</span><span class="nb">input</span><span class="p">,</span> <span class="n">input_len</span><span class="p">,</span> <span class="n">out</span><span class="p">):</span>
    <span class="n">cbi</span><span class="p">,</span><span class="n">cbd</span><span class="p">,</span><span class="n">tid</span> <span class="o">=</span> <span class="n">cuda</span><span class="p">.</span><span class="n">blockIdx</span><span class="p">,</span><span class="n">cuda</span><span class="p">.</span><span class="n">blockDim</span><span class="p">,</span><span class="n">cuda</span><span class="p">.</span><span class="n">threadIdx</span>
    <span class="n">idx</span> <span class="o">=</span> <span class="n">cbi</span><span class="p">.</span><span class="n">x</span> <span class="o">*</span> <span class="n">cbd</span><span class="p">.</span><span class="n">x</span> <span class="o">+</span> <span class="n">tid</span><span class="p">.</span><span class="n">x</span>

    <span class="k">if</span> <span class="n">idx</span> <span class="o">&gt;=</span> <span class="n">input_len</span><span class="p">:</span>
        <span class="k">return</span>
    
    <span class="k">if</span> <span class="nb">input</span><span class="p">[</span><span class="n">idx</span><span class="p">]</span> <span class="o">&gt;=</span> <span class="mi">0</span><span class="p">:</span>
        <span class="n">res</span> <span class="o">=</span> <span class="mf">1.</span> <span class="o">/</span> <span class="p">(</span> <span class="mf">1.</span> <span class="o">+</span> <span class="n">math</span><span class="p">.</span><span class="n">exp</span><span class="p">(</span><span class="o">-</span><span class="nb">input</span><span class="p">[</span><span class="n">idx</span><span class="p">])</span> <span class="p">)</span>
    <span class="k">else</span><span class="p">:</span>
        <span class="n">res</span> <span class="o">=</span> <span class="n">math</span><span class="p">.</span><span class="n">exp</span><span class="p">(</span><span class="nb">input</span><span class="p">[</span><span class="n">idx</span><span class="p">])</span> <span class="o">/</span> <span class="p">(</span> <span class="mf">1.</span> <span class="o">+</span> <span class="n">math</span><span class="p">.</span><span class="n">exp</span><span class="p">(</span><span class="nb">input</span><span class="p">[</span><span class="n">idx</span><span class="p">])</span> <span class="p">)</span>

    <span class="n">out</span><span class="p">[</span><span class="n">idx</span><span class="p">]</span> <span class="o">=</span> <span class="n">res</span>

<span class="o">@</span><span class="n">cuda</span><span class="p">.</span><span class="n">jit</span>
<span class="k">def</span> <span class="nf">sigmoid_backward</span><span class="p">(</span><span class="nb">input</span><span class="p">,</span> <span class="n">input_len</span><span class="p">,</span> <span class="n">out</span><span class="p">):</span>
    <span class="n">cbi</span><span class="p">,</span><span class="n">cbd</span><span class="p">,</span><span class="n">tid</span> <span class="o">=</span> <span class="n">cuda</span><span class="p">.</span><span class="n">blockIdx</span><span class="p">,</span><span class="n">cuda</span><span class="p">.</span><span class="n">blockDim</span><span class="p">,</span><span class="n">cuda</span><span class="p">.</span><span class="n">threadIdx</span>
    <span class="n">idx</span> <span class="o">=</span> <span class="n">cbi</span><span class="p">.</span><span class="n">x</span> <span class="o">*</span> <span class="n">cbd</span><span class="p">.</span><span class="n">x</span> <span class="o">+</span> <span class="n">tid</span><span class="p">.</span><span class="n">x</span>

    <span class="k">if</span> <span class="n">idx</span> <span class="o">&gt;=</span> <span class="n">input_len</span><span class="p">:</span>
        <span class="k">return</span>
    
    <span class="n">out</span><span class="p">[</span><span class="n">idx</span><span class="p">]</span> <span class="o">=</span> <span class="nb">input</span><span class="p">[</span><span class="n">idx</span><span class="p">]</span><span class="o">*</span><span class="p">(</span><span class="mi">1</span><span class="o">-</span><span class="nb">input</span><span class="p">[</span><span class="n">idx</span><span class="p">])</span>
</code></pre></div></div>
<p>There is a lot to unpack here, so let’s start with the first lines. We are accessing <strong><em>cuda.blockIdx</em></strong> and <strong><em>cuda.threadIdx</em></strong> to get our block and thread indexes, and <strong><em>cuda.blockDim</em></strong> to know how many threads we have per block. And since we are using a single thread to compute a single value from our input tensor, we get our final index with</p>

<p>\(idx = B_{index} * B_{size} + T_{index}\),</p>

<p>where \(B_{size}\) is the number of threads per block, \(B_{index}\) and \(T_{index}\) are the block and thread indexes.</p>

<p>Having our current index, we must check if this index is within our input tensor size, and return without doing anything if it is not. Those cases will happen when the total number of threads, i.e. number of thread blocks times block size, is not exactly the same as the input size.</p>

<p>If everything is correct, we will take the current value from input at location \(idx\) and calculate our Sigmoid. Nothing too fancy here. But we can test with the following code:</p>

<div class="language-python highlighter-rouge"><div class="highlight"><pre class="highlight"><code><span class="k">def</span> <span class="nf">sigmoid_numba</span><span class="p">(</span><span class="nb">input</span><span class="p">,</span> <span class="n">fun</span><span class="p">,</span> <span class="n">tw</span><span class="o">=</span><span class="mi">16</span><span class="p">,</span> <span class="n">gradcheck</span><span class="o">=</span><span class="bp">False</span><span class="p">):</span>
    <span class="p">(</span><span class="n">input_len</span><span class="p">,)</span> <span class="o">=</span> <span class="nb">input</span><span class="p">.</span><span class="n">shape</span>
    <span class="n">out</span> <span class="o">=</span> <span class="n">torch</span><span class="p">.</span><span class="n">zeros</span><span class="p">(</span><span class="n">input_len</span><span class="p">,</span> <span class="n">dtype</span><span class="o">=</span><span class="n">torch</span><span class="p">.</span><span class="n">float32</span><span class="p">)</span>
    <span class="n">out</span> <span class="o">=</span> <span class="n">out</span><span class="p">.</span><span class="n">contiguous</span><span class="p">().</span><span class="n">cuda</span><span class="p">()</span>
    <span class="n">tpb</span> <span class="o">=</span> <span class="n">tw</span>
    <span class="n">blocks</span> <span class="o">=</span> <span class="n">cdiv</span><span class="p">(</span><span class="n">input_len</span><span class="p">,</span><span class="n">tpb</span><span class="p">)</span>
    <span class="n">fun</span><span class="p">[</span><span class="n">blocks</span><span class="p">,</span> <span class="n">tpb</span><span class="p">](</span><span class="nb">input</span><span class="p">,</span> <span class="n">input_len</span><span class="p">,</span> <span class="n">out</span><span class="p">)</span> 
    <span class="k">return</span> <span class="n">out</span>
    
<span class="nb">input</span> <span class="o">=</span> <span class="n">torch</span><span class="p">.</span><span class="n">as_tensor</span><span class="p">([</span><span class="mf">0.3</span><span class="p">,</span> <span class="o">-</span><span class="mi">100000</span><span class="p">,</span> <span class="mi">100000</span><span class="p">,</span> <span class="mf">0.5</span><span class="p">,</span> <span class="o">-</span><span class="mf">0.5</span><span class="p">],</span> <span class="n">dtype</span><span class="o">=</span><span class="n">torch</span><span class="p">.</span><span class="n">float32</span><span class="p">)</span>
<span class="nb">input</span> <span class="o">=</span> <span class="nb">input</span><span class="p">.</span><span class="n">contiguous</span><span class="p">().</span><span class="n">cuda</span><span class="p">()</span>

<span class="n">res</span> <span class="o">=</span> <span class="n">sigmoid_numba</span><span class="p">(</span><span class="nb">input</span><span class="p">,</span> <span class="n">sigmoid_forward</span><span class="p">,</span> <span class="mi">1</span><span class="p">)</span>
<span class="n">grad</span> <span class="o">=</span> <span class="n">sigmoid_numba</span><span class="p">(</span><span class="n">res</span><span class="p">,</span> <span class="n">sigmoid_backward</span><span class="p">,</span> <span class="mi">1</span><span class="p">)</span>
</code></pre></div></div>

<p>I’ve created an auxiliary function called <strong><em>sigmoid_numba</em></strong> to encapsulate the important (and boring) code necessary to allocate our output tensor and calculate an appropriate number of threads per block and thread blocks. Those configurations have some upper limits depending on your CUDA GPU, and the optimal value for each also depends on the GPU version. But for now, we are just going with some numbers that somewhat seem right, and in the end, we can run a small benchmark to decide the best values for our particular GPU. And finally, notice that our input tensor is calling two functions: contiguous() and cuda(): <a href="https://pytorch.org/docs/stable/generated/torch.Tensor.contiguous.html#torch.Tensor.contiguous">contiguous</a> makes sure that our tensor is contiguous in memory since we are accessing it like a single dimensional array; <a href="https://pytorch.org/docs/stable/generated/torch.Tensor.cuda.html#torch.Tensor.cuda">cuda</a> returns a copy of our tensor in CUDA memory.</p>

<p>And that’s it, with this code you are programming a CUDA kernel, but with the big difference that we can use a debugger and step to our code as we wish, and with a much smaller iteration time :). Notice that it is best to set \(B_{size}=1\) when doing breakpoints since the debuggers usually don’t work well with multiple threads calling a breakpoint at the same time.</p>

<p>This Numba CUDA development is way easier, and if we change our env variable to NUMBA_ENABLE_CUDASIM=’0’ we can run this code that Numba will compile it to CUDA for us, and we can see the performance that we should get. For some reason, the direct implementation in C CUDA is usually faster, with differences of 2x to be expected, but even then it should show us how fast our final implementation should be. Notice, however, that without CUDA Simulator enabled we will lose the ability to debug our code and use numpy/torch functions. You can check out <a href="https://numba.pydata.org/numba-doc/latest/cuda/cudapysupported.html">here</a> what is supported.</p>

<h2 id="4-calling-out-chat-gpt-to-help-us">4. Calling out chat-GPT to Help Us</h2>

<p>The Numba development is there to help us, but the final goal is to generate a C CUDA kernel that we can directly call on PyTorch. Fortunately, Chat-GPT is plenty capable of doing this! I’ve pasted the following query, followed by the Numba code: “Convert the following python code to C CUDA kernel. Also add a function that uses torch library to pass the input arguments, call the CUDA kernel, and check for errors. The function must receive torch::Tensor as input and return the output as torch::Tensor.”</p>

<p>And it gave me something really close to this:</p>

<div class="language-cpp highlighter-rouge"><div class="highlight"><pre class="highlight"><code><span class="cp">#include</span> <span class="cpf">&lt;math.h&gt;</span><span class="cp">
</span>
<span class="n">__global__</span> <span class="kt">void</span> <span class="nf">sigmoid_forward_cuda_kernel</span><span class="p">(</span><span class="k">const</span> <span class="kt">float</span><span class="o">*</span> <span class="n">input</span><span class="p">,</span> <span class="kt">int</span> <span class="n">input_len</span><span class="p">,</span> <span class="kt">float</span><span class="o">*</span> <span class="n">out</span><span class="p">)</span> <span class="p">{</span>
    <span class="kt">int</span> <span class="n">idx</span> <span class="o">=</span> <span class="n">blockIdx</span><span class="p">.</span><span class="n">x</span> <span class="o">*</span> <span class="n">blockDim</span><span class="p">.</span><span class="n">x</span> <span class="o">+</span> <span class="n">threadIdx</span><span class="p">.</span><span class="n">x</span><span class="p">;</span>

    <span class="k">if</span> <span class="p">(</span><span class="n">idx</span> <span class="o">&lt;</span> <span class="n">input_len</span><span class="p">)</span> <span class="p">{</span>
        <span class="kt">float</span> <span class="n">res</span><span class="p">;</span>
        <span class="k">if</span> <span class="p">(</span><span class="n">input</span><span class="p">[</span><span class="n">idx</span><span class="p">]</span> <span class="o">&gt;=</span> <span class="mi">0</span><span class="p">)</span> <span class="p">{</span>
            <span class="n">res</span> <span class="o">=</span> <span class="mf">1.</span> <span class="o">/</span> <span class="p">(</span><span class="mf">1.</span> <span class="o">+</span> <span class="n">expf</span><span class="p">(</span><span class="o">-</span><span class="n">input</span><span class="p">[</span><span class="n">idx</span><span class="p">]));</span>
        <span class="p">}</span> <span class="k">else</span> <span class="p">{</span>
            <span class="n">res</span> <span class="o">=</span> <span class="n">expf</span><span class="p">(</span><span class="n">input</span><span class="p">[</span><span class="n">idx</span><span class="p">])</span> <span class="o">/</span> <span class="p">(</span><span class="mf">1.</span> <span class="o">+</span> <span class="n">expf</span><span class="p">(</span><span class="n">input</span><span class="p">[</span><span class="n">idx</span><span class="p">]));</span>
        <span class="p">}</span>

        <span class="n">out</span><span class="p">[</span><span class="n">idx</span><span class="p">]</span> <span class="o">=</span> <span class="n">res</span><span class="p">;</span>
    <span class="p">}</span>
<span class="p">}</span>

<span class="n">torch</span><span class="o">::</span><span class="n">Tensor</span> <span class="n">sigmoid_forward_cuda</span><span class="p">(</span><span class="n">torch</span><span class="o">::</span><span class="n">Tensor</span> <span class="n">input</span><span class="p">)</span> <span class="p">{</span>
    <span class="n">CHECK_INPUT</span><span class="p">(</span><span class="n">input</span><span class="p">);</span>
    <span class="c1">// Get the data pointers and sizes</span>
    <span class="kt">float</span><span class="o">*</span> <span class="n">input_data_ptr</span> <span class="o">=</span> <span class="n">input</span><span class="p">.</span><span class="n">data_ptr</span><span class="o">&lt;</span><span class="kt">float</span><span class="o">&gt;</span><span class="p">();</span>
    <span class="kt">int</span> <span class="n">input_len</span> <span class="o">=</span> <span class="n">input</span><span class="p">.</span><span class="n">numel</span><span class="p">();</span>

    <span class="c1">// Allocate output tensor on GPU</span>
    <span class="n">torch</span><span class="o">::</span><span class="n">Tensor</span> <span class="n">out_tensor</span> <span class="o">=</span> <span class="n">torch</span><span class="o">::</span><span class="n">empty_like</span><span class="p">(</span><span class="n">input</span><span class="p">);</span>

    <span class="c1">// Get the data pointer for the output tensor</span>
    <span class="kt">float</span><span class="o">*</span> <span class="n">out_data_ptr</span> <span class="o">=</span> <span class="n">out_tensor</span><span class="p">.</span><span class="n">data_ptr</span><span class="o">&lt;</span><span class="kt">float</span><span class="o">&gt;</span><span class="p">();</span>

    <span class="c1">// Set block and grid dimensions</span>
    <span class="kt">int</span> <span class="n">threads_per_block</span> <span class="o">=</span> <span class="mi">256</span><span class="p">;</span> <span class="c1">// You may adjust this based on your specific GPU capabilities</span>
    <span class="kt">int</span> <span class="n">num_blocks</span> <span class="o">=</span> <span class="p">(</span><span class="n">input_len</span> <span class="o">+</span> <span class="n">threads_per_block</span> <span class="o">-</span> <span class="mi">1</span><span class="p">)</span> <span class="o">/</span> <span class="n">threads_per_block</span><span class="p">;</span>

    <span class="c1">// Launch CUDA kernel</span>
    <span class="n">sigmoid_forward_cuda_kernel</span><span class="o">&lt;&lt;&lt;</span><span class="n">num_blocks</span><span class="p">,</span> <span class="n">threads_per_block</span><span class="o">&gt;&gt;&gt;</span><span class="p">(</span><span class="n">input_data_ptr</span><span class="p">,</span> <span class="n">input_len</span><span class="p">,</span> <span class="n">out_data_ptr</span><span class="p">);</span>

    <span class="c1">// Synchronize to ensure the kernel is done before proceeding</span>
    <span class="n">cudaDeviceSynchronize</span><span class="p">();</span>
    <span class="n">C10_CUDA_KERNEL_LAUNCH_CHECK</span><span class="p">();</span>

    <span class="k">return</span> <span class="n">out_tensor</span><span class="p">;</span>
<span class="p">}</span>
</code></pre></div></div>

<p>Notice that in the query we’ve explicitly told chat-GPT to accept a torch::tensor as input and return another one as output. This makes our lives so much easier in the following steps.</p>

<p>The backward pass is quite similar, and you can check it on my <a href="https://github.com/gfickel/cuda-sigmoid">repo</a>.</p>

<h2 id="5-using-pytorch-to-compile-c-cuda">5. Using PyTorch to Compile C CUDA</h2>

<p>I really didn’t know that PyTorch could do this, but if you have the dev files for CUDA and ninja build installed on your system you can pass the C CUDA code as a string and it will build it as a Python module for you. So first, to set things up we must have some auxiliary functions (thanks to Jeremy Howard), that you can check out <a href="https://github.com/gfickel/cuda-sigmoid/blob/main/utils.py">here</a>. The most important bit is a helper function to call <a href="https://pytorch.org/docs/stable/cpp_extension.html#torch.utils.cpp_extension.load_inline">load_inline</a> from PyTorch. It enables us to pass a C CUDA code as a string and compile it to a Python model containing the kernel as a Python function. It is quite amazing.</p>

<p>So, let’s compile our C CUDA kernel! Here are the steps:</p>

<div class="language-python highlighter-rouge"><div class="highlight"><pre class="highlight"><code><span class="n">cuda_src</span> <span class="o">=</span> <span class="n">FORWARD_PASS_CUDA_CODE_FROM_CHAT_GPT</span>
<span class="n">fname</span> <span class="o">=</span> <span class="s">'sigmoid_forward_cuda'</span>
<span class="n">cpp_src</span> <span class="o">=</span> <span class="s">'torch::Tensor sigmoid_forward_cuda(torch::Tensor input);'</span>

<span class="n">module_forward</span> <span class="o">=</span> <span class="n">load_cuda</span><span class="p">(</span><span class="n">cuda_src</span><span class="p">,</span> <span class="n">cpp_src</span><span class="p">,</span> <span class="p">[</span><span class="n">fname</span><span class="p">])</span>

<span class="nb">input</span> <span class="o">=</span> <span class="n">torch</span><span class="p">.</span><span class="n">as_tensor</span><span class="p">([</span><span class="mf">0.3</span><span class="p">,</span> <span class="o">-</span><span class="mi">100000</span><span class="p">,</span> <span class="mi">100000</span><span class="p">,</span> <span class="mf">0.5</span><span class="p">,</span> <span class="o">-</span><span class="mf">0.5</span><span class="p">],</span> <span class="n">dtype</span><span class="o">=</span><span class="n">torch</span><span class="p">.</span><span class="n">float32</span><span class="p">)</span>
<span class="nb">input</span> <span class="o">=</span> <span class="nb">input</span><span class="p">.</span><span class="n">contiguous</span><span class="p">().</span><span class="n">cuda</span><span class="p">()</span>
<span class="n">res</span> <span class="o">=</span> <span class="n">module_forward</span><span class="p">.</span><span class="n">sigmoid_forward_cuda</span><span class="p">(</span><span class="nb">input</span><span class="p">)</span>
</code></pre></div></div>
<p>And that’s it! But first, let’s explain those lines a little bit. First, <strong><em>cuda_src</em></strong> is a Python string containing our code that was so gently translated to us by chat GPT. <strong><em>fname</em></strong> is the function name that we want to expose as a function in our compiled module, and <strong><em>cpp_src</em></strong> is the C++ code that is compiled with our CUDA kernel, and all it has is the declaration of our function. With all of this, we can finally call our helper <strong><em>load_cuda</em></strong>, defined in our <strong><em>utils.py</em></strong> if you want to check it out, and it returns our new Python module with our <strong><em>sigmoid_forward_cuda</em></strong> function.</p>

<p>For the backward pass, it is mostly the same process, as expected. Here it is:</p>

<div class="language-python highlighter-rouge"><div class="highlight"><pre class="highlight"><code><span class="n">cuda_src</span> <span class="o">=</span> <span class="n">BACKWARD_PASS_CUDA_CODE_FROM_CHAT_GPT</span>
<span class="n">fname</span> <span class="o">=</span> <span class="s">'sigmoid_backward_cuda'</span>
<span class="n">cpp_src</span> <span class="o">=</span> <span class="s">'torch::Tensor sigmoid_backward_cuda(torch::Tensor input);'</span>

<span class="n">module_backward</span> <span class="o">=</span> <span class="n">load_cuda</span><span class="p">(</span><span class="n">cuda_src</span><span class="p">,</span> <span class="n">cpp_src</span><span class="p">,</span> <span class="p">[</span><span class="n">fname</span><span class="p">])</span>

<span class="n">grad</span> <span class="o">=</span> <span class="n">module_backward</span><span class="p">.</span><span class="n">sigmoid_backward_cuda</span><span class="p">(</span><span class="n">res</span><span class="p">)</span>
</code></pre></div></div>

<h2 id="6-check-our-gradients-again">6. Check our Gradients Again</h2>

<p>Great, we have both our forward and backward passes implemented in CUDA! However, are they correct? Did chat gpt make some silly mistake on the translation part? Well, at least we can check if the backward is indeed the correct derivation for the forward pass. Just like we did in step 2, we must call checkgradients. And to do this, first, we must adhere to the autograd interface, like this:</p>

<div class="language-python highlighter-rouge"><div class="highlight"><pre class="highlight"><code><span class="k">class</span> <span class="nc">CUDASigmoid</span><span class="p">(</span><span class="n">torch</span><span class="p">.</span><span class="n">autograd</span><span class="p">.</span><span class="n">Function</span><span class="p">):</span>
    <span class="o">@</span><span class="nb">staticmethod</span>
    <span class="k">def</span> <span class="nf">forward</span><span class="p">(</span><span class="n">ctx</span><span class="p">,</span> <span class="n">data</span><span class="p">:</span> <span class="n">torch</span><span class="p">.</span><span class="n">Tensor</span><span class="p">)</span> <span class="o">-&gt;</span> <span class="n">torch</span><span class="p">.</span><span class="n">Tensor</span><span class="p">:</span>
        <span class="n">result</span> <span class="o">=</span> <span class="n">module_forward</span><span class="p">.</span><span class="n">sigmoid_forward_cuda</span><span class="p">(</span><span class="n">data</span><span class="p">)</span>
        <span class="n">ctx</span><span class="p">.</span><span class="n">save_for_backward</span><span class="p">(</span><span class="n">result</span><span class="p">)</span>
        <span class="k">return</span> <span class="n">result</span>

    <span class="o">@</span><span class="nb">staticmethod</span>
    <span class="k">def</span> <span class="nf">backward</span><span class="p">(</span><span class="n">ctx</span><span class="p">,</span> <span class="n">grad_output</span><span class="p">:</span> <span class="n">torch</span><span class="p">.</span><span class="n">Tensor</span><span class="p">)</span> <span class="o">-&gt;</span> <span class="n">torch</span><span class="p">.</span><span class="n">Tensor</span><span class="p">:</span>
        <span class="p">(</span><span class="n">result</span><span class="p">,)</span> <span class="o">=</span> <span class="n">ctx</span><span class="p">.</span><span class="n">saved_tensors</span>
        <span class="n">grad</span> <span class="o">=</span> <span class="n">module_backward</span><span class="p">.</span><span class="n">sigmoid_backward_cuda</span><span class="p">(</span><span class="n">result</span><span class="p">)</span>
        <span class="k">return</span> <span class="n">grad_output</span> <span class="o">*</span> <span class="n">grad</span>
</code></pre></div></div>

<p>Not that bad, if you ask me, and not that different from the one from step 2. And now, for the finale:</p>

<div class="language-python highlighter-rouge"><div class="highlight"><pre class="highlight"><code><span class="n">sigmoid</span> <span class="o">=</span> <span class="n">CUDASigmoid</span><span class="p">.</span><span class="nb">apply</span>
<span class="n">data</span> <span class="o">=</span> <span class="n">torch</span><span class="p">.</span><span class="n">randn</span><span class="p">(</span><span class="mi">4</span><span class="p">,</span> <span class="n">dtype</span><span class="o">=</span><span class="n">torch</span><span class="p">.</span><span class="n">float32</span><span class="p">,</span> <span class="n">requires_grad</span><span class="o">=</span><span class="bp">True</span><span class="p">).</span><span class="n">contiguous</span><span class="p">().</span><span class="n">cuda</span><span class="p">()</span>

<span class="c1"># Changing eps and atol since we are dealing with float32
</span><span class="k">if</span> <span class="n">torch</span><span class="p">.</span><span class="n">autograd</span><span class="p">.</span><span class="n">gradcheck</span><span class="p">(</span><span class="n">sigmoid</span><span class="p">,</span> <span class="n">data</span><span class="p">,</span> <span class="n">eps</span><span class="o">=</span><span class="mf">5e-4</span><span class="p">,</span> <span class="n">atol</span><span class="o">=</span><span class="mf">1e-7</span><span class="p">):</span>
    <span class="k">print</span><span class="p">(</span><span class="s">'gradcheck successful :D'</span><span class="p">)</span>
<span class="k">else</span><span class="p">:</span>
    <span class="k">print</span><span class="p">(</span><span class="s">'gradcheck unsuccessful :D'</span><span class="p">)</span>
</code></pre></div></div>
<p>You may have noticed a small, but very important change here: we are using float32 instead of double. Our CUDA implementation only deals with float32, so we can’t test with float64. However, this presents some challenges for our gradcheck, since floating point errors are way more present, and we end it up having to change our <em>eps</em> to a higher value. I’ve tested with our vanilla PyTorch implementation to get a “correct” value for it, and then plug it back here. This is not a good practice, but in order to keep our CUDA code simpler I’ve avoided supporting other types than float32.</p>

<p>With those caveats aside, our gradcheck should be passing and we are officially golden, our CUDA Sigmoid implementation is over!</p>

<h2 id="conclusions">Conclusions</h2>

<p>Uou, that was a long post. However, I tried to skim only the not-critical details and explain in greater detail the development pipeline. That is the key point that you should be taking from here: how to make CUDA development less sucky. And by using this PyTorch feature to compile CUDA code, we can even run CUDA kernels on Google Collabs! You can check my Jupyter Notebook <a href="https://github.com/gfickel/cuda-sigmoid">here</a> and give it a try!</p>

<p>I do believe that this is an interesting knowledge to have, and in this day and age of huge LLMs, being able to tackle some performance bottlenecks can have a great impact as mentioned in my introduction. In the end, it somewhat boils down to what my older sister always told me: “Knowledge doesn’t occupy space” :)</p>]]></content><author><name></name></author><category term="jekyll" /><category term="update" /><summary type="html"><![CDATA[I still remember the “dark ages” of research, when I was still doing my masters when it was common to find really impactful publications that provided no code. And yes, I’ve sent my fair share of emails to authors… Fortunately, this is no longer the norm, and even somewhat frowned upon. Caffe, Tensorflow, Keras, PyTorch, and even more deep learning frameworks really helped everyone to create way smaller, cleaner code, that was also easier to share.]]></summary></entry><entry><title type="html">Welcome to Jekyll!</title><link href="/jekyll/update/2024/02/22/welcome-to-jekyll.html" rel="alternate" type="text/html" title="Welcome to Jekyll!" /><published>2024-02-22T22:55:11+00:00</published><updated>2024-02-22T22:55:11+00:00</updated><id>/jekyll/update/2024/02/22/welcome-to-jekyll</id><content type="html" xml:base="/jekyll/update/2024/02/22/welcome-to-jekyll.html"><![CDATA[<p>You’ll find this post in your <code class="language-plaintext highlighter-rouge">_posts</code> directory. Go ahead and edit it and re-build the site to see your changes. You can rebuild the site in many different ways, but the most common way is to run <code class="language-plaintext highlighter-rouge">jekyll serve</code>, which launches a web server and auto-regenerates your site when a file is updated.</p>

<p>Jekyll requires blog post files to be named according to the following format:</p>

<p><code class="language-plaintext highlighter-rouge">YEAR-MONTH-DAY-title.MARKUP</code></p>

<p>Where <code class="language-plaintext highlighter-rouge">YEAR</code> is a four-digit number, <code class="language-plaintext highlighter-rouge">MONTH</code> and <code class="language-plaintext highlighter-rouge">DAY</code> are both two-digit numbers, and <code class="language-plaintext highlighter-rouge">MARKUP</code> is the file extension representing the format used in the file. After that, include the necessary front matter. Take a look at the source for this post to get an idea about how it works.</p>

<p>Jekyll also offers powerful support for code snippets:</p>

<figure class="highlight"><pre><code class="language-ruby" data-lang="ruby"><span class="k">def</span> <span class="nf">print_hi</span><span class="p">(</span><span class="nb">name</span><span class="p">)</span>
  <span class="nb">puts</span> <span class="s2">"Hi, </span><span class="si">#{</span><span class="nb">name</span><span class="si">}</span><span class="s2">"</span>
<span class="k">end</span>
<span class="n">print_hi</span><span class="p">(</span><span class="s1">'Tom'</span><span class="p">)</span>
<span class="c1">#=&gt; prints 'Hi, Tom' to STDOUT.</span></code></pre></figure>

<p>Check out the <a href="https://jekyllrb.com/docs/home">Jekyll docs</a> for more info on how to get the most out of Jekyll. File all bugs/feature requests at <a href="https://github.com/jekyll/jekyll">Jekyll’s GitHub repo</a>. If you have questions, you can ask them on <a href="https://talk.jekyllrb.com/">Jekyll Talk</a>.</p>]]></content><author><name></name></author><category term="jekyll" /><category term="update" /><summary type="html"><![CDATA[You’ll find this post in your _posts directory. Go ahead and edit it and re-build the site to see your changes. You can rebuild the site in many different ways, but the most common way is to run jekyll serve, which launches a web server and auto-regenerates your site when a file is updated.]]></summary></entry><entry><title type="html">100x speedup on Python with just a touch of C++</title><link href="/jekyll/update/2022/05/13/100x-speedup-on-python-with-just-a-touch-of-c.html" rel="alternate" type="text/html" title="100x speedup on Python with just a touch of C++" /><published>2022-05-13T15:00:00+00:00</published><updated>2022-05-13T15:00:00+00:00</updated><id>/jekyll/update/2022/05/13/100x-speedup-on-python-with-just-a-touch-of-c</id><content type="html" xml:base="/jekyll/update/2022/05/13/100x-speedup-on-python-with-just-a-touch-of-c.html"><![CDATA[<p>Python is a great language. I still remember my first contact with Python2 some 8 years ago, and I was amazed by how clean and expressive it was. And now, with Python3, a lot has changed. It is now the de facto language for machine learning (so long, Matlab!), and lots of amazing stuff have been built with it.</p>

<p>All is good and dandy, however from time to time I’ve encountered a brick wall when working on Python: how slow it is. Don’t get me wrong, if you are using libs to do your heavy processing, such as NumPy, you are good to go. But it’s important to notice that the core of NumPy is not Python, and for a reason. It’s just not the language for that.</p>

<p>For most cases, you can use such libs and pass those crunch-intensive stuff to them, but sometimes you want something not so conventional and that does not conform with such limitations. And then you end up writing two nested fors in Python, processing a Full HD image, and you want to cry…</p>

<p>Fortunately, we can write those code hot spots in C++, and it is surprisingly simple to do it and seamlessly integrate with Python. However, this opens another can of worms that is C++, and its dependencies and compatibilities. For anyone that had to target Linux, Windows in both 32 and 64 bits should know what I’m talking about. So for me it is of the utmost importance that it can be used seamlessly in any platform without any dependencies other than a C++ compiler.</p>

<p>So upfront I’m already discarding <a href="https://www.boost.org/doc/libs/1_66_0/libs/python/doc/html/index.html">Boost.Python</a> and <a href="https://github.com/pybind/pybind11">PyBind11</a>. I’ve used both, and usually prefer PyBind11 since it is much easier to manage on different platforms. But one dependency is one too many. And as I will show it now, you don’t need them for most cases.</p>

<p>Let’s start with a very simple and naive example: normalize the contrast of a black and white image.</p>

<div class="language-python highlighter-rouge"><div class="highlight"><pre class="highlight"><code><span class="kn">import</span> <span class="nn">numpy</span> <span class="k">as</span> <span class="n">np</span>

<span class="k">def</span> <span class="nf">naive_contrast_image</span><span class="p">(</span><span class="n">image</span><span class="p">):</span>
    <span class="n">result</span> <span class="o">=</span> <span class="n">np</span><span class="p">.</span><span class="n">zeros</span><span class="p">(</span><span class="n">image</span><span class="p">.</span><span class="n">shape</span><span class="p">,</span> <span class="n">dtype</span><span class="o">=</span><span class="n">np</span><span class="p">.</span><span class="n">uint8</span><span class="p">)</span>
    <span class="n">min_color</span><span class="p">,</span> <span class="n">max_color</span> <span class="o">=</span> <span class="n">np</span><span class="p">.</span><span class="nb">min</span><span class="p">(</span><span class="n">image</span><span class="p">),</span> <span class="n">np</span><span class="p">.</span><span class="nb">max</span><span class="p">(</span><span class="n">image</span><span class="p">)</span>
    <span class="n">delta_color</span> <span class="o">=</span> <span class="n">max_color</span><span class="o">-</span><span class="n">min_color</span>
    <span class="k">for</span> <span class="n">row</span> <span class="ow">in</span> <span class="nb">range</span><span class="p">(</span><span class="n">image</span><span class="p">.</span><span class="n">shape</span><span class="p">[</span><span class="mi">0</span><span class="p">]):</span>
        <span class="k">for</span> <span class="n">col</span> <span class="ow">in</span> <span class="nb">range</span><span class="p">(</span><span class="n">image</span><span class="p">.</span><span class="n">shape</span><span class="p">[</span><span class="mi">1</span><span class="p">]):</span>
            <span class="n">pixel</span> <span class="o">=</span> <span class="n">image</span><span class="p">[</span><span class="n">row</span><span class="p">,</span><span class="n">col</span><span class="p">]</span>
            <span class="n">result</span><span class="p">[</span><span class="n">row</span><span class="p">,</span><span class="n">col</span><span class="p">]</span> <span class="o">=</span> <span class="mi">255</span><span class="o">*</span><span class="p">(</span><span class="n">pixel</span><span class="o">-</span><span class="n">min_color</span><span class="p">)</span><span class="o">/</span><span class="n">delta_color</span>

    <span class="k">return</span> <span class="n">result</span>
</code></pre></div></div>

<p>So this code generates the following result:</p>

<p><img src="/assets/turing.png" alt="Contrast example image" /></p>

<p>This is a very simple and naive example that could (and should) be done using NumPy. But let us do this in C++.</p>

<p>The first difference in C++ is that you should specify the variable types. So let us define image as an np.uint8 array, and the resulting image with the same type. On C++ this can be represented as unsigned char. Let’s take a look at our implementation. On contrast_image.h:</p>

<div class="language-c++ highlighter-rouge"><div class="highlight"><pre class="highlight"><code><span class="cp">#include</span> <span class="cpf">&lt;algorithm&gt;</span><span class="cp">
#include</span> <span class="cpf">&lt;vector&gt;</span><span class="cp">
</span>
<span class="k">extern</span> <span class="s">"C"</span> <span class="p">{</span>

<span class="kt">void</span> <span class="n">cpp_contrast_image</span><span class="p">(</span><span class="k">const</span> <span class="kt">unsigned</span> <span class="kt">char</span> <span class="o">*</span><span class="n">image</span><span class="p">,</span> <span class="kt">int</span> <span class="n">height</span><span class="p">,</span> <span class="kt">int</span> <span class="n">width</span><span class="p">,</span> <span class="kt">unsigned</span> <span class="kt">char</span> <span class="o">*</span><span class="n">outResult</span><span class="p">);</span>

<span class="p">}</span> <span class="c1">// extern "C"</span>
</code></pre></div></div>

<p>And contrast_image.cpp:</p>
<div class="language-c++ highlighter-rouge"><div class="highlight"><pre class="highlight"><code>
<span class="cp">#include</span> <span class="cpf">"contrast_image.h"</span><span class="cp">
</span>
<span class="kt">void</span> <span class="nf">cpp_contrast_image</span><span class="p">(</span><span class="k">const</span> <span class="kt">unsigned</span> <span class="kt">char</span> <span class="o">*</span><span class="n">image</span><span class="p">,</span> <span class="kt">int</span> <span class="n">height</span><span class="p">,</span> <span class="kt">int</span> <span class="n">width</span><span class="p">,</span> <span class="kt">unsigned</span> <span class="kt">char</span> <span class="o">*</span><span class="n">outResult</span><span class="p">)</span> <span class="p">{</span>
    <span class="k">auto</span> <span class="n">vec</span> <span class="o">=</span> <span class="n">std</span><span class="o">::</span><span class="n">vector</span><span class="o">&lt;</span><span class="kt">unsigned</span> <span class="kt">char</span><span class="o">&gt;</span><span class="p">(</span><span class="n">image</span><span class="p">,</span> <span class="n">image</span><span class="o">+</span><span class="n">width</span><span class="o">*</span><span class="n">height</span><span class="p">);</span>
    <span class="k">auto</span> <span class="n">minmax</span> <span class="o">=</span> <span class="n">std</span><span class="o">::</span><span class="n">minmax_element</span><span class="p">(</span><span class="n">vec</span><span class="p">.</span><span class="n">begin</span><span class="p">(),</span> <span class="n">vec</span><span class="p">.</span><span class="n">end</span><span class="p">());</span>
    <span class="kt">float</span> <span class="n">min</span> <span class="o">=</span> <span class="p">(</span><span class="kt">float</span><span class="p">)</span><span class="o">*</span><span class="n">minmax</span><span class="p">.</span><span class="n">first</span><span class="p">;</span>
    <span class="kt">float</span> <span class="n">max</span> <span class="o">=</span> <span class="p">(</span><span class="kt">float</span><span class="p">)</span><span class="o">*</span><span class="n">minmax</span><span class="p">.</span><span class="n">second</span><span class="p">;</span>
    <span class="kt">float</span> <span class="n">delta_color</span> <span class="o">=</span> <span class="n">max</span><span class="o">-</span><span class="n">min</span><span class="p">;</span>
    <span class="k">for</span> <span class="p">(</span><span class="kt">int</span> <span class="n">row</span><span class="o">=</span><span class="mi">0</span><span class="p">;</span> <span class="n">row</span><span class="o">&lt;</span><span class="n">height</span><span class="p">;</span> <span class="n">row</span><span class="o">++</span><span class="p">)</span> <span class="p">{</span>
        <span class="k">for</span> <span class="p">(</span><span class="kt">int</span> <span class="n">col</span><span class="o">=</span><span class="mi">0</span><span class="p">;</span> <span class="n">col</span><span class="o">&lt;</span><span class="n">width</span><span class="p">;</span> <span class="n">col</span><span class="o">++</span><span class="p">)</span> <span class="p">{</span>
            <span class="kt">int</span> <span class="n">idx</span> <span class="o">=</span> <span class="n">row</span><span class="o">*</span><span class="n">width</span> <span class="o">+</span> <span class="n">col</span><span class="p">;</span>
            <span class="kt">float</span> <span class="n">pixel</span> <span class="o">=</span> <span class="p">(</span><span class="kt">float</span><span class="p">)</span><span class="n">image</span><span class="p">[</span><span class="n">idx</span><span class="p">];</span>
            <span class="n">outResult</span><span class="p">[</span><span class="n">idx</span><span class="p">]</span> <span class="o">=</span> <span class="p">(</span><span class="kt">unsigned</span> <span class="kt">char</span><span class="p">)(</span><span class="mi">255</span><span class="o">*</span><span class="p">(</span><span class="n">pixel</span><span class="o">-</span><span class="n">min</span><span class="p">)</span><span class="o">/</span><span class="n">delta_color</span><span class="p">);</span>
        <span class="p">}</span>
    <span class="p">}</span>
<span class="p">}</span>
</code></pre></div></div>

<p>There are some small but very important details here, so let’s start with the important ones.</p>

<ol>
  <li>Avoid dynamic memory allocation on C++. Python Garbage Collector will not see them so you will have to free them by yourself. Prefer to allocate the memory with NumPy. This will be shown further along.</li>
  <li>Multiple dimensional arrays are actually just a single array with some syntactic sugar to access it. You’ll notice the direct idx calculation on the example. It is a good practice to create a function to give you the index given the desired position to avoid silly bugs.</li>
  <li>Access and/or modify an invalid array position will generate the dreadful Segmentation Fault. So always be diligent with the range checks.</li>
  <li>The function must have a C compatible interface, as we can see with the extern “C” on contrast_image.h. Usually this is not a big deal since we can use all the desired C++ stuff within the implementation on contrast_image.cpp, however we will have to implement different versions for different input types since templates are not available on the function definition :(.</li>
</ol>

<p>Finally, returning complex objects within a C interface is not the easiest and cleanest thing to do. So for the most part I just reserve my final arguments to return my value. And also, use const on every array that you should not change and let the compiler help you find bugs.</p>

<p>Ok, we have a C++ code that does exactly what we want and can compile it to a lib with:</p>
<div class="language-sh highlighter-rouge"><div class="highlight"><pre class="highlight"><code>g++ <span class="nt">-Wall</span> <span class="nt">-O2</span> <span class="nt">-c</span> <span class="nt">-fPIC</span> contrast_image.cpp

g++ contrast_image.o <span class="nt">-shared</span> <span class="nt">-o</span> libcontrast_image.so
</code></pre></div></div>

<p>Until now I did not say anything out of the ordinary, but we are surprisingly close to finishing it. Python has a useful and easy way to access a C compiled libs using ctypes. So this is how we will use our cpp_contrast_image on Python:</p>

<div class="language-python highlighter-rouge"><div class="highlight"><pre class="highlight"><code><span class="kn">import</span> <span class="nn">ctypes</span>
<span class="kn">import</span> <span class="nn">numpy</span> <span class="k">as</span> <span class="n">np</span>
<span class="kn">from</span> <span class="nn">numpy.ctypeslib</span> <span class="kn">import</span> <span class="n">ndpointer</span>

<span class="n">lib</span> <span class="o">=</span> <span class="n">ctypes</span><span class="p">.</span><span class="n">CDLL</span><span class="p">(</span><span class="s">'./libcontrast_image.so'</span><span class="p">)</span>

<span class="n">c_contrast_image</span> <span class="o">=</span> <span class="n">lib</span><span class="p">.</span><span class="n">cpp_contrast_image</span>
<span class="n">c_contrast_image</span><span class="p">.</span><span class="n">argtypes</span> <span class="o">=</span> <span class="p">[</span>
    <span class="n">ndpointer</span><span class="p">(</span><span class="n">ctypes</span><span class="p">.</span><span class="n">c_ubyte</span><span class="p">,</span> <span class="n">flags</span><span class="o">=</span><span class="s">'C_CONTIGUOUS'</span><span class="p">),</span>
    <span class="n">ctypes</span><span class="p">.</span><span class="n">c_int</span><span class="p">,</span>
    <span class="n">ctypes</span><span class="p">.</span><span class="n">c_int</span><span class="p">,</span>
    <span class="n">ndpointer</span><span class="p">(</span><span class="n">ctypes</span><span class="p">.</span><span class="n">c_ubyte</span><span class="p">,</span> <span class="n">flags</span><span class="o">=</span><span class="s">'C_CONTIGUOUS'</span><span class="p">),</span>
<span class="p">]</span>

<span class="k">def</span> <span class="nf">contrast_image</span><span class="p">(</span><span class="n">image</span><span class="p">):</span>
    <span class="n">result</span> <span class="o">=</span> <span class="n">np</span><span class="p">.</span><span class="n">zeros</span><span class="p">(</span><span class="n">image</span><span class="p">.</span><span class="n">shape</span><span class="p">,</span> <span class="n">dtype</span><span class="o">=</span><span class="n">np</span><span class="p">.</span><span class="n">uint8</span><span class="p">)</span>
    <span class="n">c_contrast_image</span><span class="p">(</span><span class="n">image</span><span class="p">,</span> <span class="n">image</span><span class="p">.</span><span class="n">shape</span><span class="p">[</span><span class="mi">0</span><span class="p">],</span> <span class="n">image</span><span class="p">.</span><span class="n">shape</span><span class="p">[</span><span class="mi">1</span><span class="p">],</span> <span class="n">result</span><span class="p">)</span>
    <span class="k">return</span> <span class="n">result</span>
</code></pre></div></div>

<p>And that’s it! You can use the new contrast_image python function with exactly the same interface, but much faster! How fast, you may ask. Well, on my i7 8550-U it went from 1229.050ms to 1.645ms on this demo image. Quite a difference! That’s actually over 700x faster, way over the promised 100x. The reason is that in our use cases we often see a speedup of a little over 100 times, so I’m trying to not over-promise here.</p>

<p>Just as with our C++ code, we have some important stuff to notice here. So let’s do it:</p>

<ol>
  <li>On C++ we treated our NumPy arrays as a single contiguous array. Usually that is the case, but not always! Fortunately we can explicit this constraint on Python itself, informing that our NumPy array is of type char and must be contiguous. If you call it with the wrong type an exception will be raised, saving you from a possible Segmentation Fault. You can check the available c_types <a href="https://docs.python.org/3/library/ctypes.html">here</a>.</li>
  <li>Remember that we are avoiding to allocate memory on the C++ code? So we are doing it here, by explicitly allocating the result image with np.zeros.</li>
  <li>We have to explicitly point to where our compiled C++ library is to be loaded from, using ctypes.CDLL.</li>
</ol>

<p>That’s it! Within a few lines of code you have lots of freedom to easily integrate C++ code into Python, and all of that without any dependency :)</p>

<p>You may be thinking that this is a silly example. And you are right. But you can do lots of stuff with this knowledge. For example, we decreased the runtime of a rasterization algorithm from 2.5s to 1.8ms, quite a hefty difference! You can read all of that on a following post to be released. But I’ll warn you, it was really easy :)</p>

<p>Finally, I must quote a great thinker: “With great powers comes great responsibility”. For an untrained person dabbling with pointers at C++ is a quick road to memory leaks and Segmentation Faults. Actually, even for trained ones. So it is a good practice to keep those codes as short as possible, usually not replacing a whole function but just the slow parts. And don’t forget to do lots of unit tests to catch some unusual edge cases. But if you are willing to deal with those drawbacks, a whole new world of crazy fast code awaits you!</p>

<p>PS.: All of this code and the benchmark script can be seen on <a href="https://github.com/gfickel/python_cpp">https://github.com/gfickel/python_cpp</a>. It is meant to only illustrate the interface between C++ and Python, so everything surrounding it is not production ready. This is up to the reader ;)</p>

<p>PS2.: Thanks to Michele Tanus, Gustavo Führ and Roger Granada for proofreading and greatly improving this post.</p>]]></content><author><name></name></author><category term="jekyll" /><category term="update" /><summary type="html"><![CDATA[Python is a great language. I still remember my first contact with Python2 some 8 years ago, and I was amazed by how clean and expressive it was. And now, with Python3, a lot has changed. It is now the de facto language for machine learning (so long, Matlab!), and lots of amazing stuff have been built with it.]]></summary></entry></feed>